Very EATalian

food, photography, italy

  • Home
  • About me
  • Recipes
    • Appetizers
    • Breakfast
    • Cheese & eggs
    • Desserts & Sweets
    • Drinks
    • Fish & Seafood
    • Holidays
    • Meat
    • Pasta & Gnocchi
    • Pizza & Bread
    • Rice & Grains
    • Side Dishes
    • Soups
    • Vegetarian
  • Italy
    • Behind the scenes
    • Life in Italy
    • Travel
  • Contact
  • SEARCH

Tiramisù

February 14, 2015 By very EATalian 5 Comments

Tiramisu | veryEATalian-9

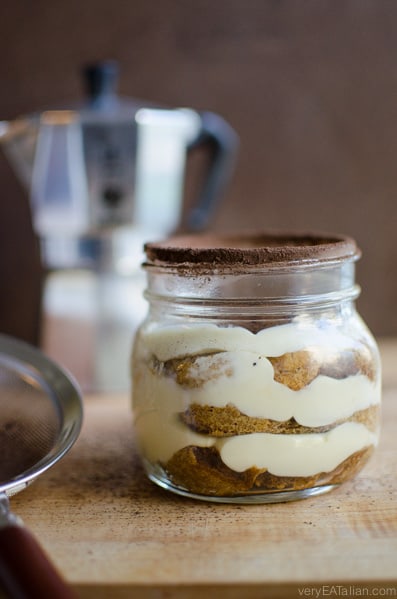
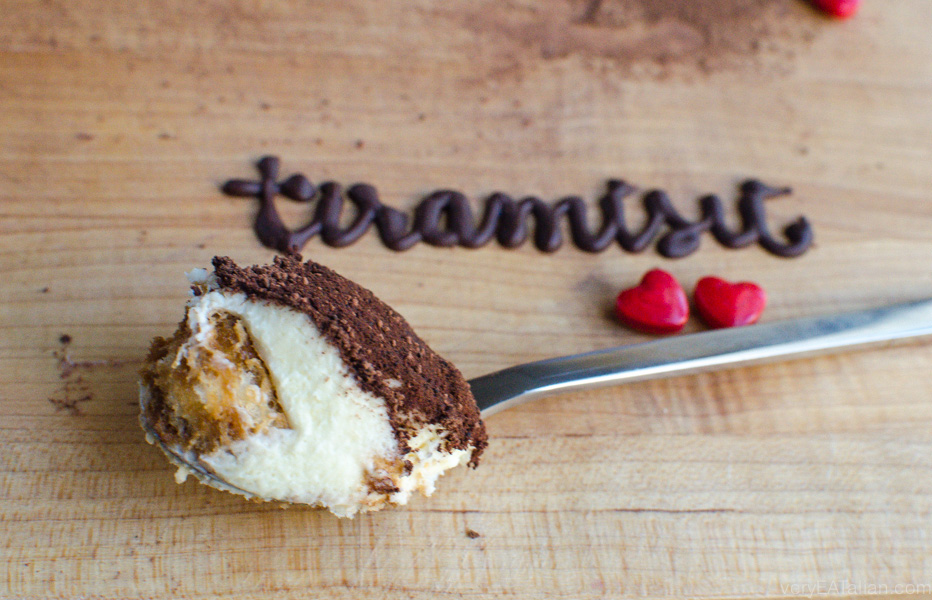
Tiramisù doesn’t require any introduction. Everybody knows it and everybody loves it. It’s such an easy dessert; no baking is required, only fresh ingredients.

Every time I make it I think of my friend Gina. She’s one of the most enthusiastic, fun, and energetic people I know. If you are around her, you know you’re going to have a good time. From the moment she tasted my tiramisù at one of our office potlucks, she started raving about it to everybody and she still does, after so many years! If I were to sell it, I’d definitely hire her as my spokesperson.

I’ve never been very secretive about my recipes and when Gina asked me if she could share it with a friend, I was all for it. I should clarify this recipe is slightly revised from the traditional one; I use whipped heavy cream instead of whipped egg whites. The result is a creamier and richer texture. I sometimes like to add chocolate chips to the cream, to add a bit of a crunch.

Tiramisù has always been my family’s favorite birthday dessert. This year, it’s my Valentine’s Day treat for my husband.

Buon San Valentino everyone!

Tiramisu | veryEATalian

Tiramisu | veryEATalian-8

Tiramisu | veryEATalian-3

Tiramisu | veryEATalian-5

Tiramisu | veryEATalian-2

Tiramisu | veryEATalian-7

TIRAMISU’
Serves: 8 people | Prep Time: 40 min | Resting Time: 3-4 hrs

INGREDIENTS
3 fresh large egg yolks*
6 Tbsp sugar (+ 2 Tbsp for the coffee)
500 g (17.6 oz) mascarpone cheese
250 ml (~1 cup) heavy cream
1 1/2 cups espresso coffee, cooled
(optional) A dash of Marsala wine or coffee liqueur
400 gr (14 oz) Savoiardi or ladyfingers cookies
Unsweetened cocoa powder, as needed

INSTRUCTIONS
1. Beat the egg yolks with a whisk in a bowl and gradually add the sugar until thick and pale. Add the mascarpone cheese to the egg yolk and sugar mixture and mix it all together until smooth.
2. Whip the heavy cream in a separate bowl to stiff peaks.
3. Gently fold the whipped cream into the mixture, carefully stirring with a spoon, until you obtain a smooth, rich, and thick cream.  [Tip: If the cream is too thin, cover it and refrigerate it until achieves the right consistency]
4
. Pour the coffee and 2 tablespoons of sugar in a bowl. Add a bit of Marsala wine or liqueur in it, if you like it, and let it cool off.
5. Dip the savoiardi cookies in the coffee for about two seconds. The soaked cookie shouldn’t be too dry or too soggy. Start forming the first layer, placing each cookie side by side until you cover the whole surface of the baking dish or bowl (you can break the cookies, if necessary).
6. Pour a layer of the cream mixture on top, alternating with another layer of savoiardi. The final layer should be cream.
7. Dust generously with cocoa powder. Cover the dish with foil or plastic wrap and refrigerate it for 3 or 4 hours. Eat within two days (good luck making it last more than 1 day!).

Buon appetito!

-Lisa

*This dish contains raw eggs. Use only fresh and clean eggs with intact shells and avoid any contact between the yolk and the shell.

Filed Under: Desserts & Sweets Tagged With: coffee, dessert, espresso, italian, ladyfingers, savoiardi, tiramisu

Gnocchi di Ricotta with Butter and Sage Sauce

February 4, 2015 By very EATalian 6 Comments

Gnocchi di Ricotta are an easy and light alternative to their more famous cousin, Gnocchi di Patate. They require less prep time and the texture isn’t as tricky to master. There is one key rule to keep in mind when making both types of gnocchi: do not overwork the dough. Knead it just as long as it takes for the ingredients to hold together into a workable dough.  The less flour you use, the lighter the dumpling will be.

This dish is quite elegant, yet easy to make. Thanks to  their delicate taste, Gnocchi di Ricotta go well with a variety of sauces. In this post I’m showcasing a very basic sauce, simply made of butter and sage, cooked at very low heat and emulsified with a few spoonfuls of cooking water.

If you’d like to give this recipe a spin, just add a sauteed vegetable, like tomatoes or mushrooms. My husband LOVED them and made me promise to make more soon!


DSC_0568-2

DSC_0596

DSC_0606

DSC_0602

GNOCCHI DI RICOTTA
Servings: 2  | Prep time: 20 min | Cook time: 4 min

INGREDIENTS

GNOCCHI
220 g (1 cup) ricotta cheese
30 g (1/2 cup) freshly grated Parmigiano Reggiano cheese + more to sprinkle on top
1 large egg, beaten
110 g (3/4 cup) all purpose flour + more for dusting
a pinch of nutmeg
salt
freshly ground black pepper

BUTTER AND SAGE SAUCE
unsalted butter
a few sprigs of sage
boiling salted water (from the pot where you cook gnocchi)

INSTRUCTIONS
1. Mix together ricotta, egg, parmesan cheese, nutmeg, salt, and pepper in a bowl .
2. Add flour and stir to form a soft, wet, and workable dough.
3. Generously dust working surface with flour. Roll dough into a cylindrical shape, until you reach the desired thickness (I rolled mine 1-inch thick).  Cut into pieces using a lightly floured knife and move the gnocchi onto a tray lined with parchment paper.
4. Add water to a pot and bring to boil. Add salt (as you would for pasta). At the same time prepare the butter and sage sauce (instructions below).
5. Cook gnocchi in batches, gently dropping them into the boiling water. Stir and wait until they rise to the surface. Lift them out with a strainer and place them on the pan containing the butter sauce.
6. Cook gnocchi in the butter and sage sauce on low heat for few more minutes, often lifting the pan a few inches from the stove and swirling it a few times.
7. Garnish with fresh sage, if desired, and sprinkle pepper and grated parmesan cheese on top.

BUTTER AND SAGE SAUCE
1. Place a pan on the stove on low heat and add butter and sage.
2. Before the butter melts all the way, remove the pan from the heat, lifting it and swirling it around. Add a couple of tablespoons of salted boiling water from the other pot. Keep swirling.
3. Return the pan to the stove for a minute, and then remove it again, swirling the pan a few inches above the heat, until the butter melts entirely. Add a couple more tablespoons of water and swirl again. 4. Keep the sauce hot over very low heat until gnocchi are ready.

Buon appetito!
-Lisa


Filed Under: Pasta & Gnocchi

Basic Bread

February 2, 2014 By very EATalian

Is there a better way to start a blog about Italian food other than with the most basic recipe for Italian bread?  In my family, bread has always been one of the key elements on the table. It’s always there, in its own little basket, ready to be torn into pieces to accompany the meal, or to be used as a soft, yet crunchy surface for a delicate slice of prosciutto crudo.

Since my family and I used to live a bit far from the town’s center, the main bakery delivered fresh bread to us and other families in the neighborhood every day. The bakery van would drop off a bunch of brown paper bags full of bread of all kinds at the house of signora Catina, a 2 minutes’ walk from my old house. Walking there to fetch our bread was one of my summertime chores.  It was easy to tell our bag apart from the others from far away, as it was the biggest one with a French baguette sticking out.

After several years, the bakery stopped delivering bread, and eventually my mother decided it was just better to make our own bread.  This turned out to the best idea ever.  Have you ever lived in a house that smells like fresh baked bread, 4 days a week? Oh my gosh, it’s like living in heaven. It’s one of the most comforting and compelling aromas I know. It’s the smell of plenty and love.

Shortly after I arrived in the States, I realized I missed the delicious scent of my mother’s bread pervading the house. It didn’t take long until I decided to follow my mother’s steps and start baking bread regularly.  Here I’m sharing one of the most basic recipes. The sky’s the limit when it comes to bread. Different types of flour, longer resting times, and the addition of ingredients such as olive oil or seeds yield a variety of textures and flavors.

There are many ways to use bread. My favorite? Fare la “scarpetta”–cleaning up the sauce from your plate with a piece of bread.  I realize it isn’t very classy…but why would you let so much goodness go to waste?

DSC_0425

DSC_0505

DSC_0524

BASIC BREAD
Yield: 1 big loaf (12 slices) | Prep time: 2 hrs | Baking time: 30-40 min
Note: This recipe requires a scale.

INGREDIENTS
500 gr (1.1 lb) Italian “00” flour or all-purpose flour
300 ml (10 oz) lukewarm water
7 gr (1 packet) active dry yeast
8 gr (1 1/2 tsp) salt
12 gr (3 tsp) granulated sugar

INSTRUCTIONS
1. Dissolve the yeast and sugar together in a glass of lukewarm water. Sift the flour in a medium-sized bowl and add the yeast/water/sugar mixture in it. Work the dough with your hands until all ingredients are incorporated.
2. Take the dough onto a clean working surface and start kneading. Add salt. Keep on kneading for about 10 minutes, until it reaches a soft, slightly sticky, smooth texture. Take the dough and bang it on the counter, 6-7 times. Score a cross on the dough ball and place in a bowl, covered by a clean dishtowel. Let it rest for an hour in a dry place.
3. Once the dough has risen in volume, give it the shape you prefer without working it too much. Transfer it onto a baking tray, cover it again, and let it rest for 40 more minutes.
4. Turn your oven to 425°F.
5. Make a couple of incisions on the top of the loaf and dust the surface with some flour, spreading it with your hands. Bake in the oven until it reaches a nice golden color (about 30-40 minutes). If you’d like to get a very crunchy crust, you can glaze it by lightly spraying the bread surface with some water, for a couple of times while it’s baking.
6. Test for doneness by tapping the bottom (if it sounds empty, it’s done).
7. Remove it from the oven and place it on a cooling rack.

Buon appetito!
-Lisa

Filed Under: Pizza & Bread Tagged With: baked, Bread, flour, italian, recipe, staple

  • « Previous Page
  • 1
  • …
  • 12
  • 13
  • 14
  • Bloglovin
  • Facebook
  • Instagram
  • Pinterest
  • Tumblr
  • Twitter

WELCOME!

WELCOME!

I'm Lisa and this is where I like to share Italian recipes and stories about my Italian family. If you'd like to learn more about me, head over to my About page.

[F O L L O W • M E • O N • B L O G L O V I N' ]

Recipes from Friuli Venezia Giulia

Creamy Polenta with Grana Padano Cheese Fondue | Very EATalian

More Posts from this Category

Pasta & Gnocchi

Spaghetti with Tuna, Lemon and Creamy Stracciatella, Cheese | Very EATalian
Simple and flavorful Pasta e Ceci (Pasta with Chickpeas) | Very EATalian
Orecchiette with Sausage, Broccoli Rabe, and Sun-dried Tomatoes | Very EATalian
Butternut squash ravioli with sage and amaretti cookie crumbles

More Posts from this Category

Sweets & Dessert

Ciambelle al Vino: Crunchy Wine Cookies | Very EATalian
Jam-filled Pasta Frolla Cookies! Buttery, sweet and tart, they're versatile and perfect for Valentine's Day!
Crostoli: a perfectly crisp Carnevale Treat | Very EATalian

More Posts from this Category

Thanksgiving in Italy

September: time to harvest grapes to make “Il Vino del Nonno”

Trip to Sicily

Tasting Frittelle in Venice

Behind the Scenes of a Grappa Distillery

Behind the Scenes of an Artisanal Fresh Pasta Shop

STAY CONNECTED!
  • Bloglovin
  • Facebook
  • Instagram
  • Pinterest
  • Tumblr
  • Twitter
All recipes, written content, and photographs on this website have been created exclusively for Very EATalian (unless otherwise noted) and are protected by copyright. You may not use any content from this website for commercial use without express permission from the author.
Creative Commons License
This work is licensed under a Creative Commons Attribution-NonCommercial-ShareAlike 3.0 Unported License.

© 2025 Very EATalian. All rights reserved