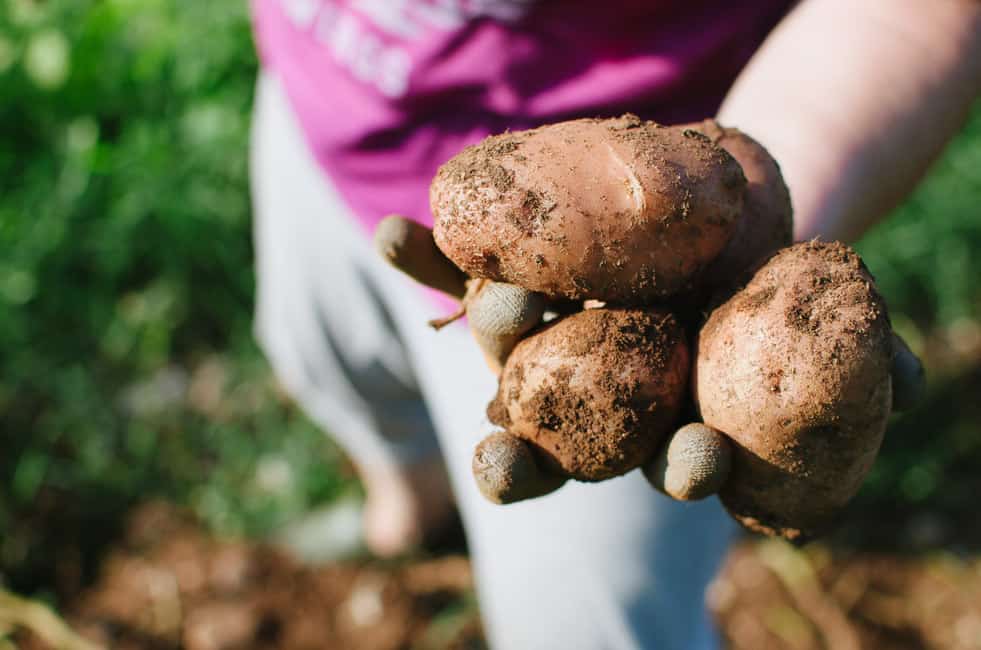
A few weeks ago, I was leaving the house to go to yoga practice when my mom called me to let me know the family was harvesting potatoes. I drove to our patch of land and saw that my uncles and aunts were all there, bending over the freshly plowed soil to pick up the potatoes my dad had planted last spring. I’m not sure whether or not I was looking for an excuse to skip yoga (I’m terrible at finding motivation to work out) but I love being together with my family for things like this – that is, working to harvest fruits and vegetables we will all enjoy for many months to come. So I went back home, dropped the mat and towel, grabbed my camera and rushed back to the potato patch….
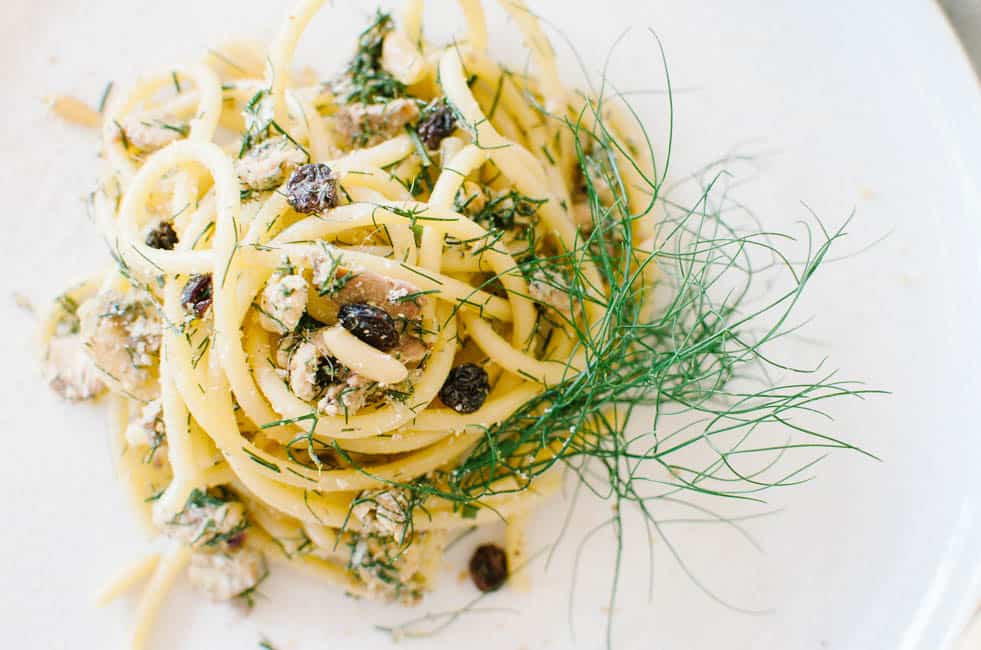
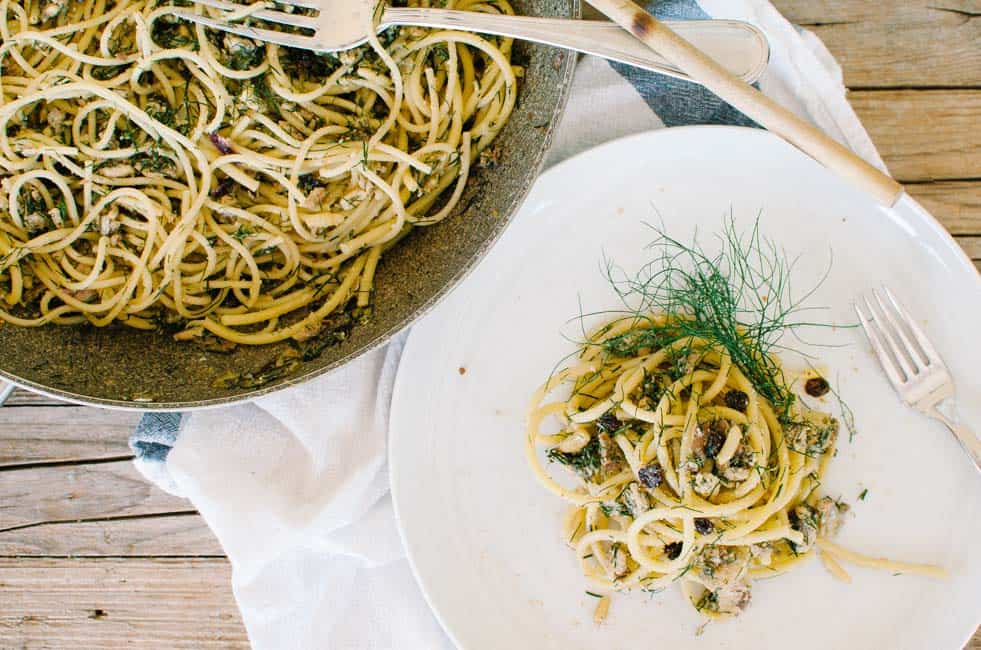
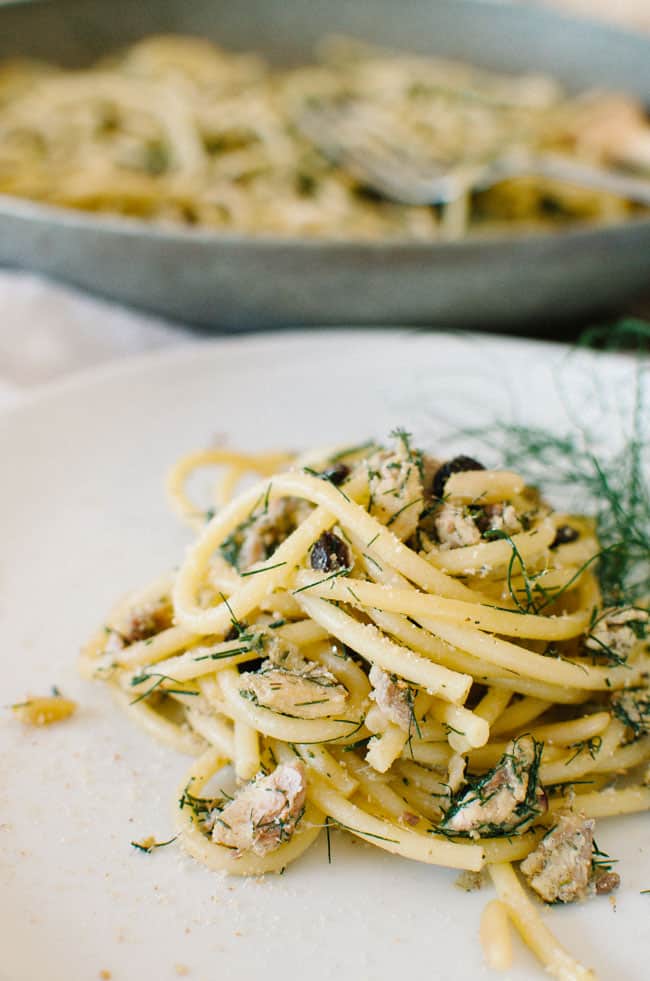
Sicilian Pasta with Sardines
These days I’m a little obsessed with Sicilian cuisine, mostly because I recently met a lady who, just like me, is married to a Sicilian man and has a great passion for food. It didn’t take a long time until she started sharing recipes she inherited from her mother-in-law. Few days later, a bunch of Sicilian ingredients started flowing into my kitchen.
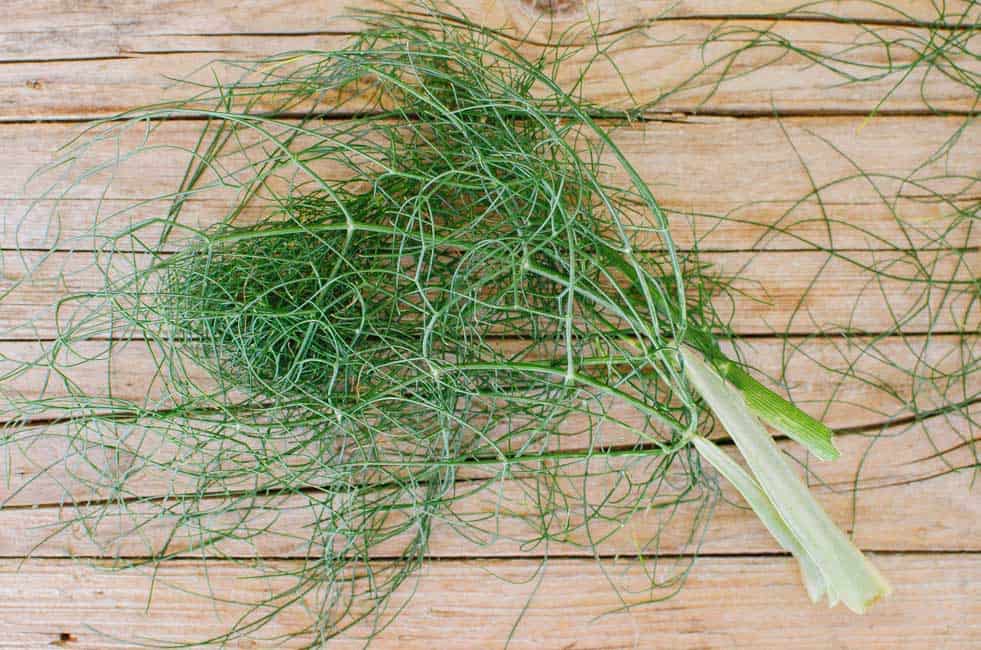
When I told her I wanted to make Pasta con le Sarde (one of Sicily’s signature dishes), she sent me two key ingredients to make it: a bag of uvetta passolina from Palermo (Zante currants) and a bunch of finocchietto selvatico (wild fennel). As if that wasn’t kind enough, she also included a handwritten recipe. I love it when people take time to write. I love it even more if they write about food!
Pasta con Sarde, as the names suggests, is made with sardines. Sardines are plentiful in Sicily and much cheaper than other fish – it’s no wonder it’s used in many peasant cooking dishes. The recipe also includes other ingredients such as pine nuts, anchovies, onion, and saffron…sounds Middle Eastern, doesn’t it? The legend says the recipe was created by the cooks of an Arab conqueror who landed in Sicily back in 827. The cooks, in an effort to muster up food for the troops, caught sardines in the harbor, harvested wild fennel, currants and pine nuts from the surrounding land and combined all the ingredients, creating a unique and intriguing flavor palette… it’s sweet and salty, slightly tangy, and definitely aromatic. It perfectly represents Sicily, a beautiful island with such a peculiar heritage.
Everybody loved it here. My dad had seconds and even had leftovers the following day! That’s another great things about this pasta…It makes great leftovers; just make sure you cook it al dente to begin with. Then, the next day, sprinkle it with some slivered almonds and bake it for a few minutes. I know some of these ingredients aren’t available in other parts of the world but you can easily substitute wild fennel with regular fennel and Zante currants with raisins. Unless you’re able to travel to Palermo, that’s the easiest way to bring a little bit of Sicily to your table.
- 1 lb (450 g) whole fresh sardines
- a bunch of wild fennel (or 3 baby fennel bulbs, fronds included)
- 1 medium onion, chopped
- a handful of Zante currants
- 3 anchovy fillets
- ⅓ cup (40 g) pine nuts
- a pinch of saffron
- 320 g bucatini pasta
- 2 Tbsp toasted breadcrumbs
- salt
- pepper
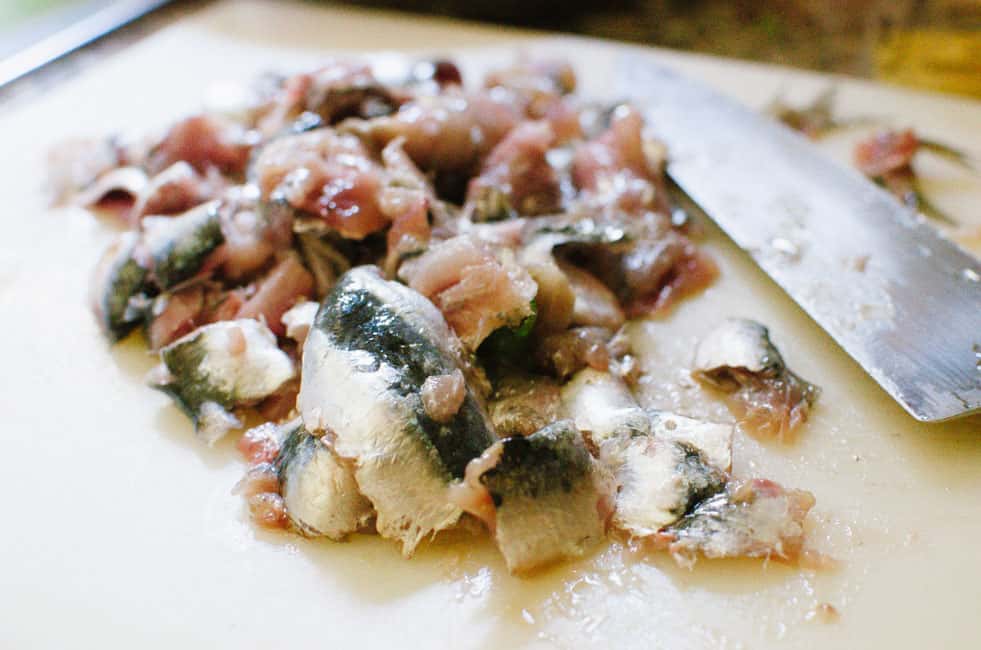
- Clean sardines: Rinse sardines under cold water, gently scraping the skin toward the head to remove the scales. Remove head by pulling it backward, toward the spine. Hold the fish with one hand and with the other, pull the backbone from the head, carefully lifting it up and away from the fillet; discard it. Rinse each fillet under cold water and set aside.
- Discard rough parts of wild fennel and boil fronds in water for a few minutes until softer (if using regular fennel, cook it until tender - about 10 minutes). With a slotted spoon, drain fennel, reserving cooking water. Roughly chop fennel.
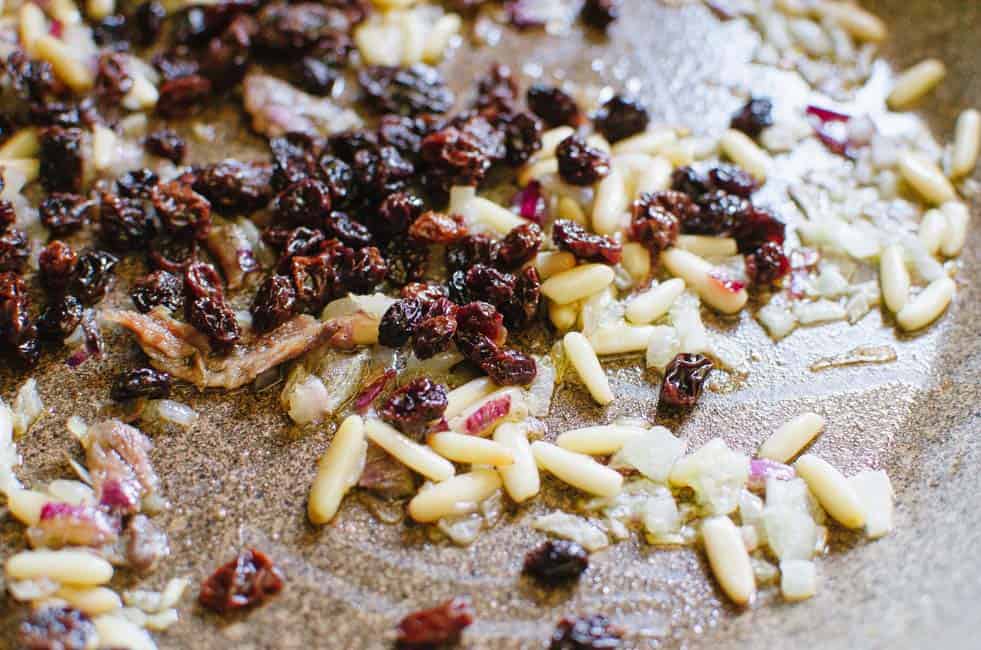
- Sauté chopped onion until translucent, add anchovies, pine nuts, zante currants, chopped fennel. Cook for a few minutes, adding salt and pepper to taste. Add ½ cup or more of cooking water and let it evaporate (you'll want to get a moist condiment). In a small glass mix saffron with a bit of water and then add to the pan containing the rest of the ingredients.
- Cook bucatini pasta in the cooking water you reserved. While pasta is boiling, add chopped sardines in the pan containing the condiment. Cook for few minutes (you don't want the sardines to be over-cooked).
- When pasta is al dente, drain it and toss it in the pan (reserving a cup of cooking water). Mix well and sprinkle with some toasted breadcrumbs. Add cooking water as needed, to prevent the pasta to become dry. Let it rest a couple of minutes and serve.
Almond Basil Pesto Sauce
One of the best parts of being back in Italy is having access to my mom’s garden. If only I had her green thumb! I mean, I’m not terrible at nursing indoor plants and potted herbs, but an outdoor garden is a whole different story. A garden requires lots of patience (definitely not my strongest suit) and many, many hours of work. It’s a true labor of love.
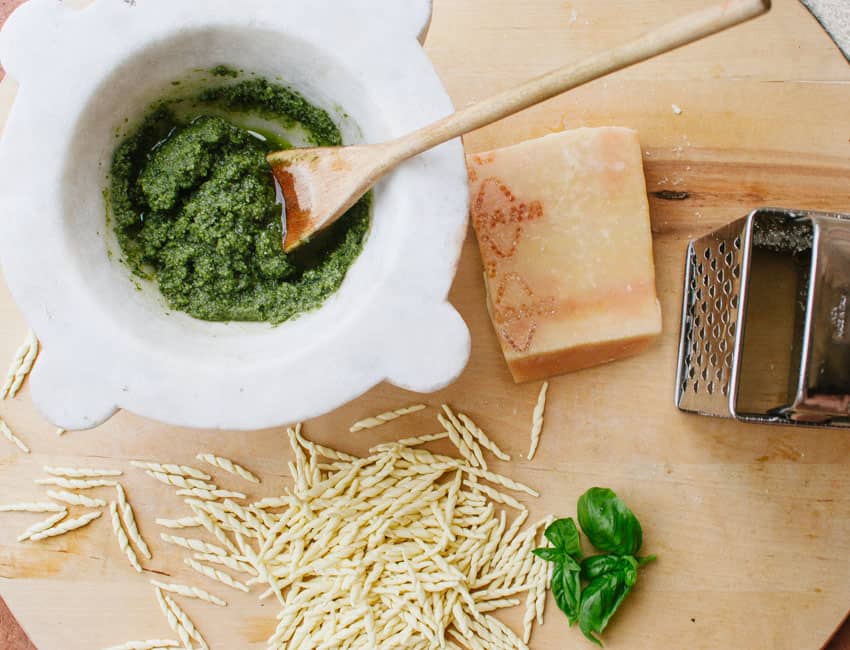
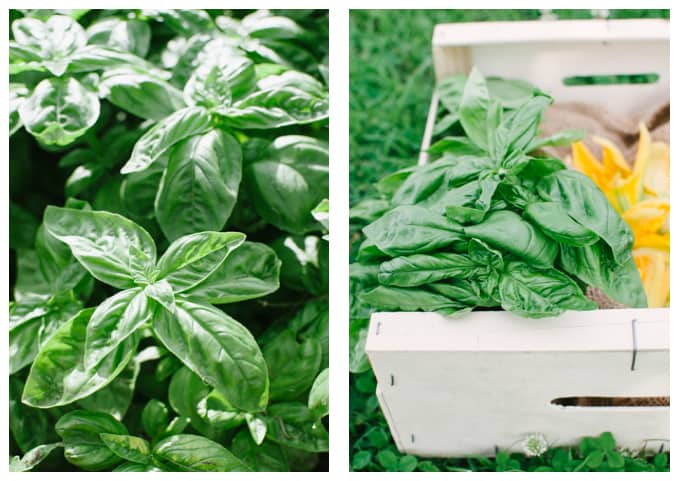
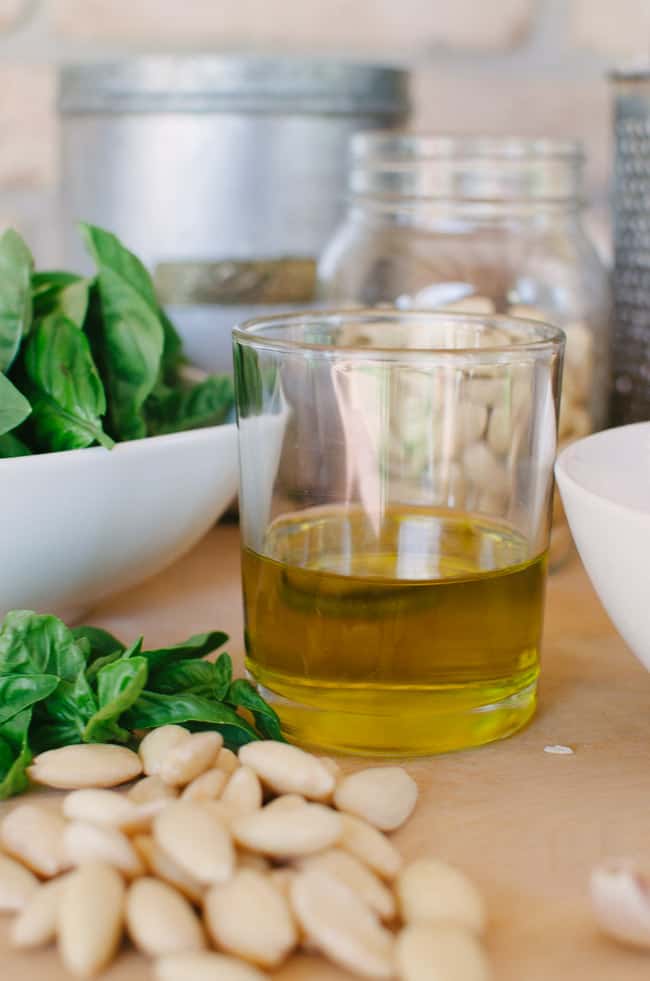
This year her garden is more beautiful and rich than ever: she planted tomatoes, carrots, string beans, celery, Swiss chard, zucchini, cucumbers, iceberg lettuce, kale, bell peppers, eggplants, strawberries, parsley,….and lots of basil. So green and so thriving! As soon as I saw it, I thought of making a nice pasta with fresh pesto sauce. After completing my garden shopping by filling my basket with a whole bunch of basil leaves (and other fresh goodies), I trotted my way back to the kitchen where I soon realized I ran out of pine nuts–one of the key ingredients for a traditional pesto sauce! Thankfully, I had some almonds and I promptly switched gear (different kinds of nuts work well with pesto–I’ll definitely try the pistachio version soon!).
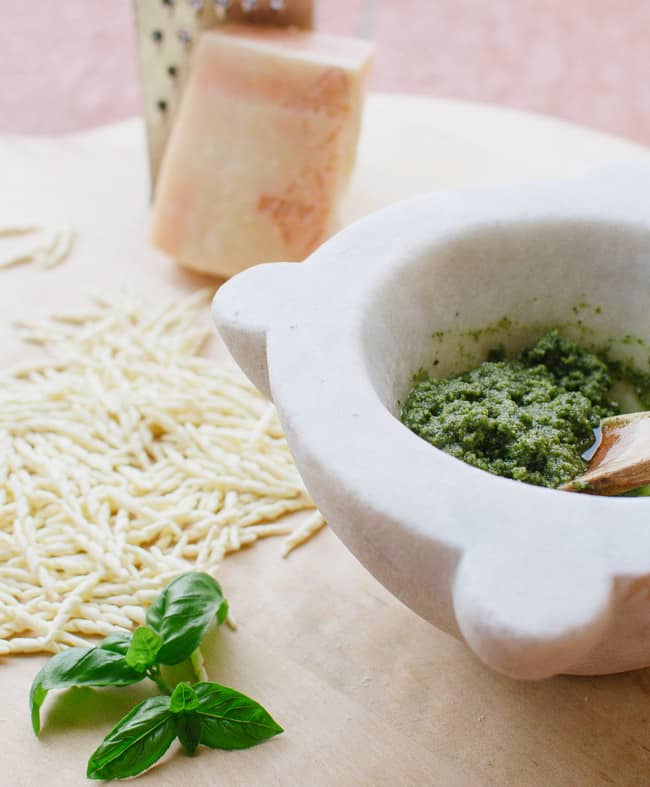
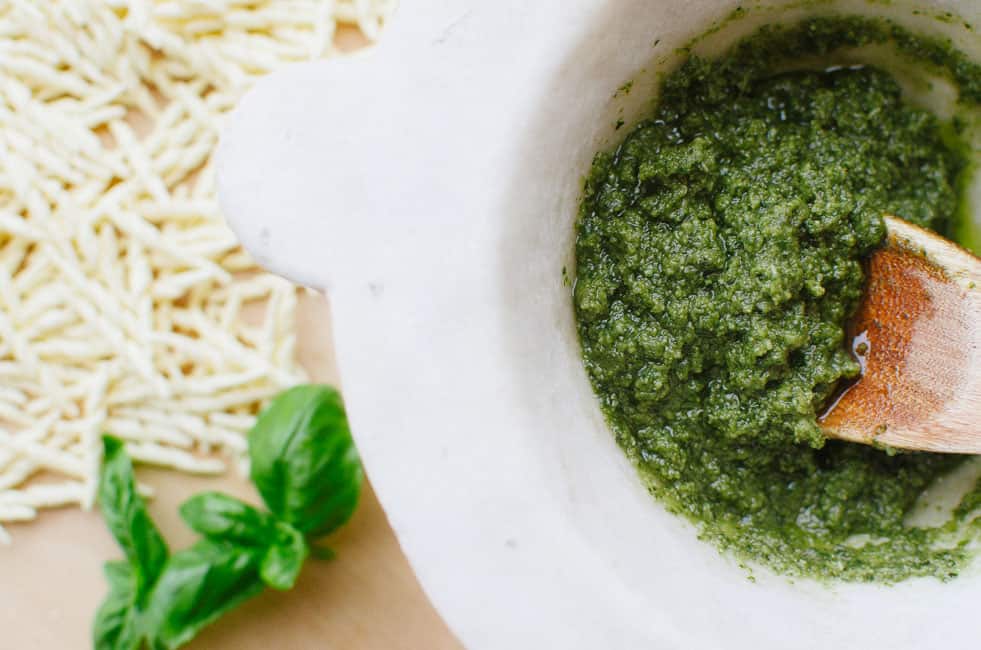
When all the ingredients were ready and I was about to pull out the food processor, my mom reminded me of a gorgeous marble mortar that was sitting in the basement, by the fireplace. Over the years it kind of lost its real purpose and became more of a holder for random things – birthday candles, a matchbox, wine corks…just to name few. My initial excitement to feature such a cool utensil in my photos immediately vanished when I found out the pestle was missing. Uh oh. The mortar was too cool to let go of the idea to use it.
“Damn Stubborn” is my middle name. So there I was, trying to miraculously turn all the ingredients into a sauce, by banging the thick end of a wooden spoon against them. Although my pictures may suggest differently, after about 10 minutes of frantic beating , I dumped everything into the food processor bowl. 2 minutes–done.
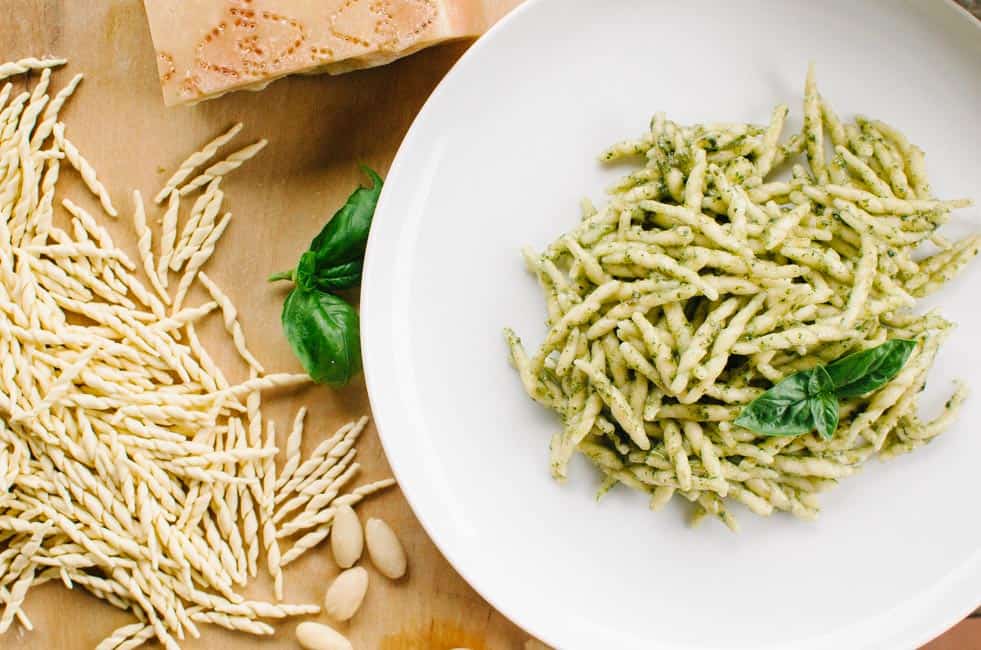
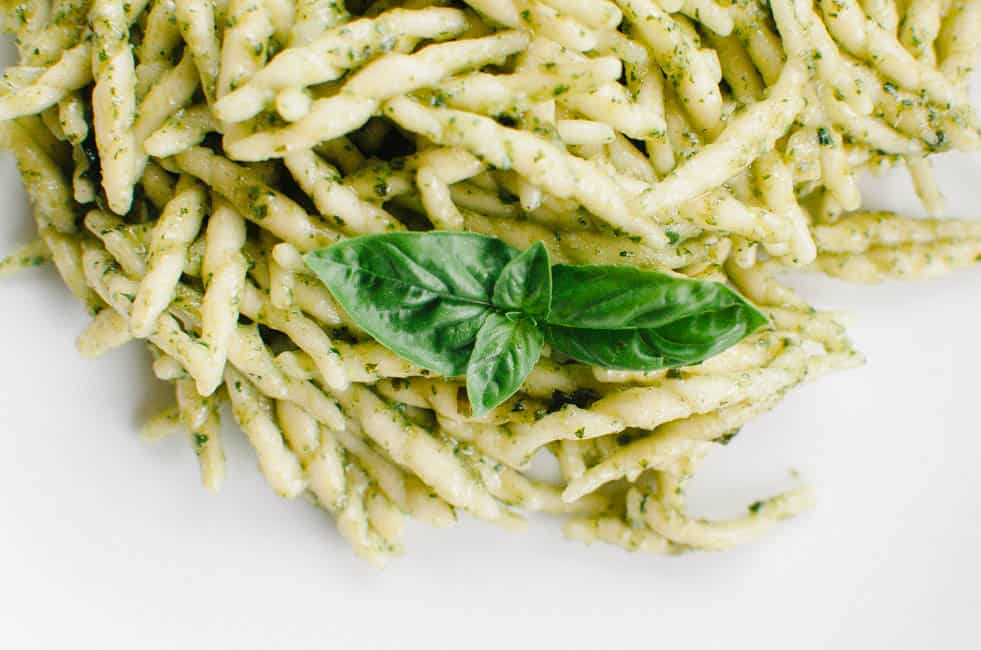
I love how all the ingredients beautifully come together in this lovely sauce. It’s so flavorful and fresh! Pesto is a perfect summer condiment and it’s quite versatile! I like to use it as a pasta sauce, but it can also be a delicious spread on a hot panini. I recently had a “white” pizza with pesto on top. Lovely.
Now, there’s one important thing you should know about pesto: it easily turns dark unless you follow few basic rules. I’m fascinated with the scientific aspect of cooking and Dario Bressanini‘s blog is a great read for whomever is interested in learning about the science of food. Unfortunately, I think his blog is only available in Italian. However, here are a few things I learned from his interesting article on pesto:
*The ingredients should be processed in such a way not to heat them. Refrigerate the ingredients before using them, and add the cheese at the very end. Placing your food processor blades in the freezer also helps.
*The basil shouldn’t be exposed to oxygen while being processed. Pour the oil on top of the basil leaves and push them down with a spoon until they’re all covered in oil. Using a small food processor (think Magic Bullet) helps minimizing the oxygen exposure. For my pesto, I used a hand-held blender.
Just stick to these rules and your pesto will be bright green!
- a handful of almonds, peeled and ground
- 50 basil leaves, washed with cold water and patted dry
- ¾ cup extra-virgin olive oil (the best kind you can find)
- 1 garlic clove, minced
- a pinch of coarse salt
- 50 g (1.7 oz) parmesan cheese
- (optional, and only if making pasta) 2-3 Tbsp cooking water
- Place the basil leaves inside a small and clean food processor and pour the oil on top. Push the basil leaves down with a spoon until they're all covered by oil. Add salt, minced garlic, and ground almonds.
- Grind all the ingredients, until you obtain a nice sauce. Pour it in a small bowl and stir in Parmesan cheese. Add more salt, if needed.
- Don't worry if the sauce is too thick for your pasta. You can loosen it up by stirring in a couple of spoonfuls of cooking water or adding a bit of oil.
- Take time to carefully pat your basil dry
- Refrigerate the garlic, the ground almonds, and the extra-virgin olive oil before use.
- Place your food processor blades in the freezer before use.
Did you enjoy this recipe? Please show your love and leave a comment or tag @veryEATalian on Twitter or Instagram! Grazie mille <3
Cjalsons: Sweet and Savory Dumplings from Friuli
I’m back home! Alabama was nice–but 3 weeks in a hotel room with only a microwave was loooong. Our hotel quality-of-life was definitely improved by the espresso machine we brought from home. Although it’s highly probable the housekeeper thought we were a couple of cuckoos, we felt exceptionally proud of our survival forethought.
YAY for being back at having fun in the kitchen!
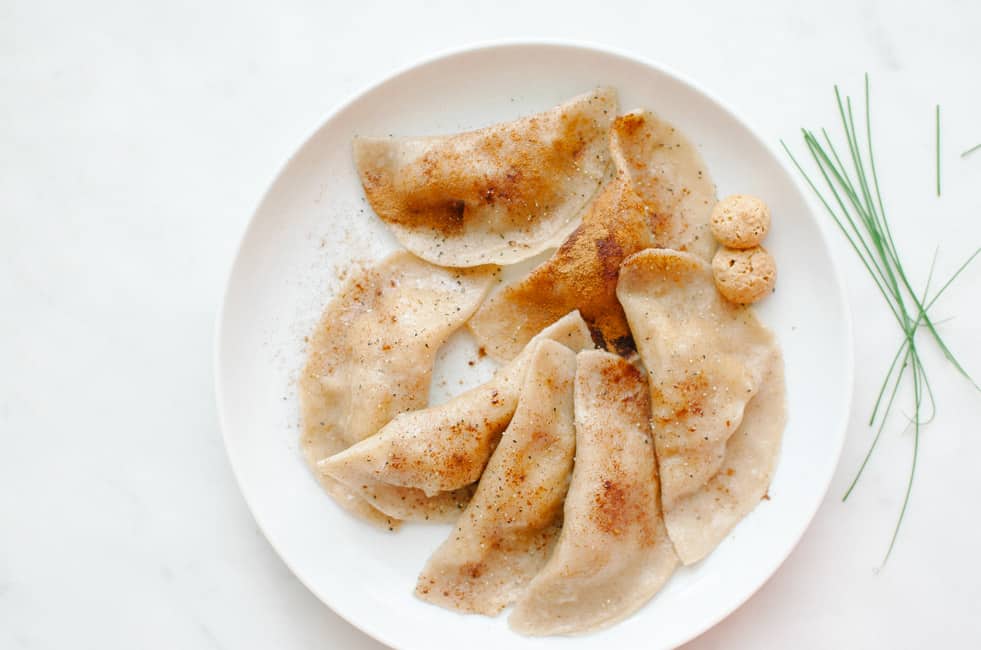
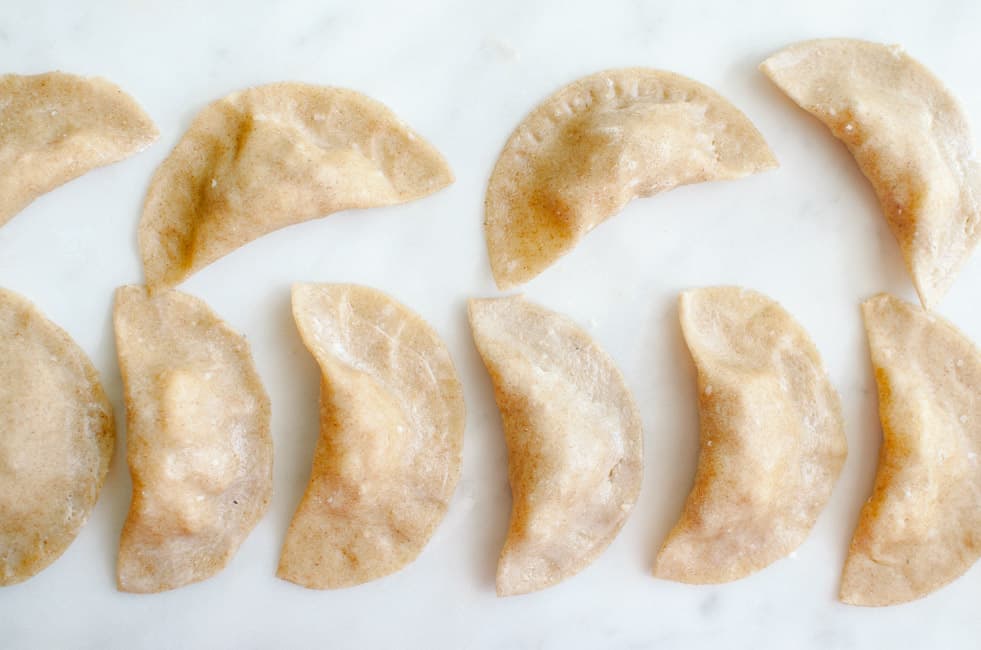
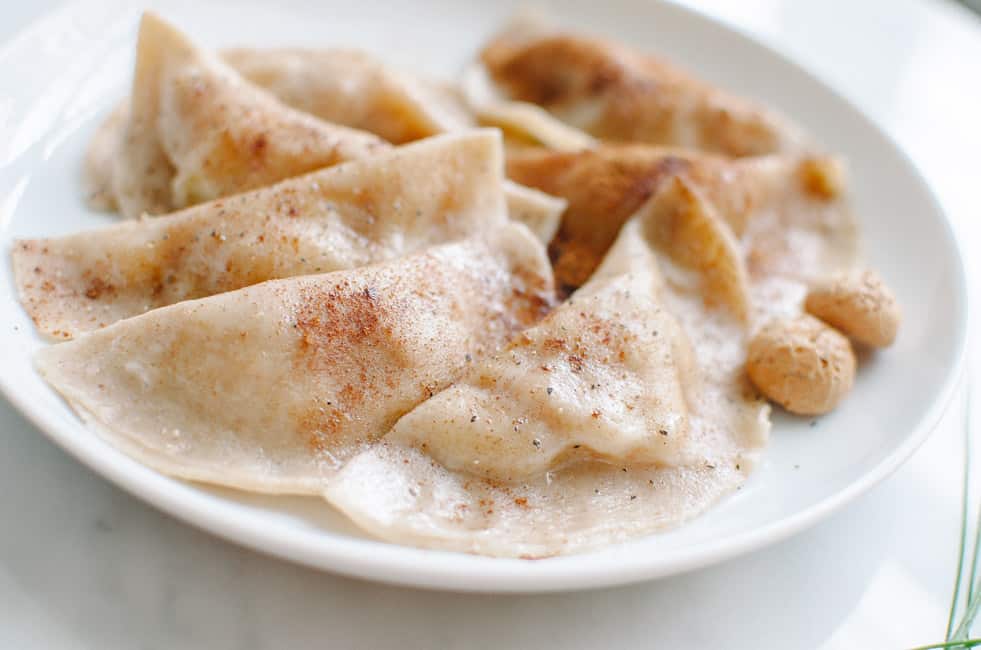
There’s nothing better than homemade “ravioli” to start cooking again. Well, these aren’t exactly ravioli per se…but kind of similar. These tasty dumplings are called cjalsons (or cjarsons) and they’re traditionally cooked for festivities in the mountains of Friuli (the most Northeastern Italian region and where I call home).
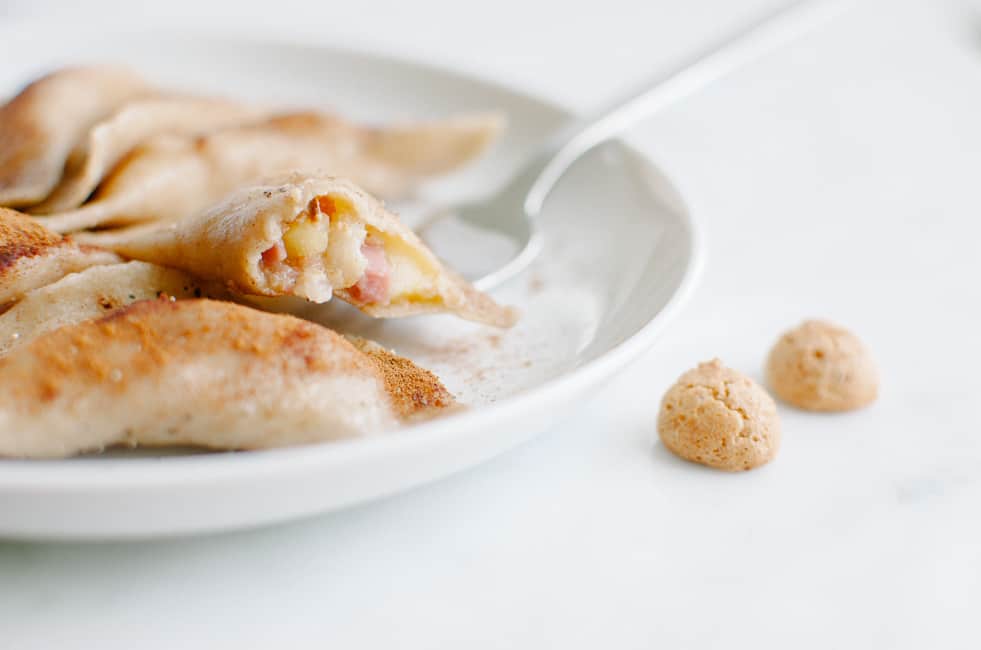
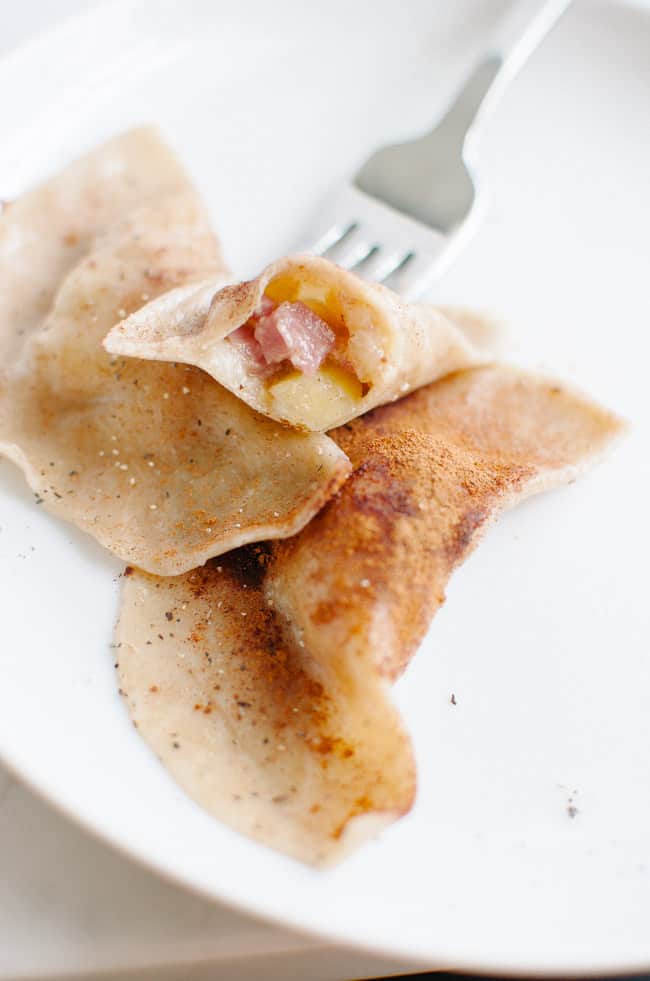
The dough is usually prepared with water, flour, salt and, sometimes, potatoes. The filling usually features a nice combination of sweet and salty ingredients like mashed potatoes, raisins, smoked ricotta cheese, cinnamon, cookies, herbs or chocolate. Like for many other Italian dishes, there are many versions of cjalsons. Back home, we use this recipe: we jazz up the traditional filling by using apple, pear, pancetta, and amaretti cookies. These ingredients give the filling a nice variety of textures and an intriguing flavor: they’re sweet with a nice kick of saltiness. The best part is the butter/parmesan/cinnamon finish. I used parmesan cheese (Parmigiano Reggiano!) because it’s hard to find smoked ricotta here. If you do find it, use it by all means. Just shave it on top. It’s absolutely the best way to serve this wonderful dish.
Expect more cjalsons recipes in the future. I looooove food from Friuli!
- 75 g (1/2 cup) all-purpose flour
- 75 g (1/2 cup) whole wheat flour
- 40 gr (a bit less than 3 Tbsp) of butter, melted + 1 Tbsp for final seasoning
- 40 ml (1.3 oz or 2 Tbsp and 2 tsp) of water
- 1 yolk
- 55 g (about 2 oz) of pancetta, minced
- ½ apple
- 1 small pear
- 4 regular-sized (or 10 mini) amaretti cookies, crumbled
- pepper
- sugar
- salt
- cinnamon
- Mix flour, water, melted butter and yolk in a bowl. Once the ingredients are combined, transfer onto a clean surface and knead until dough becomes uniform and smooth. Cover with plastic film and refrigerate for 30 minutes.
- Cut the apple and the pear in small cubes (about ¼ inch or 6 mm).
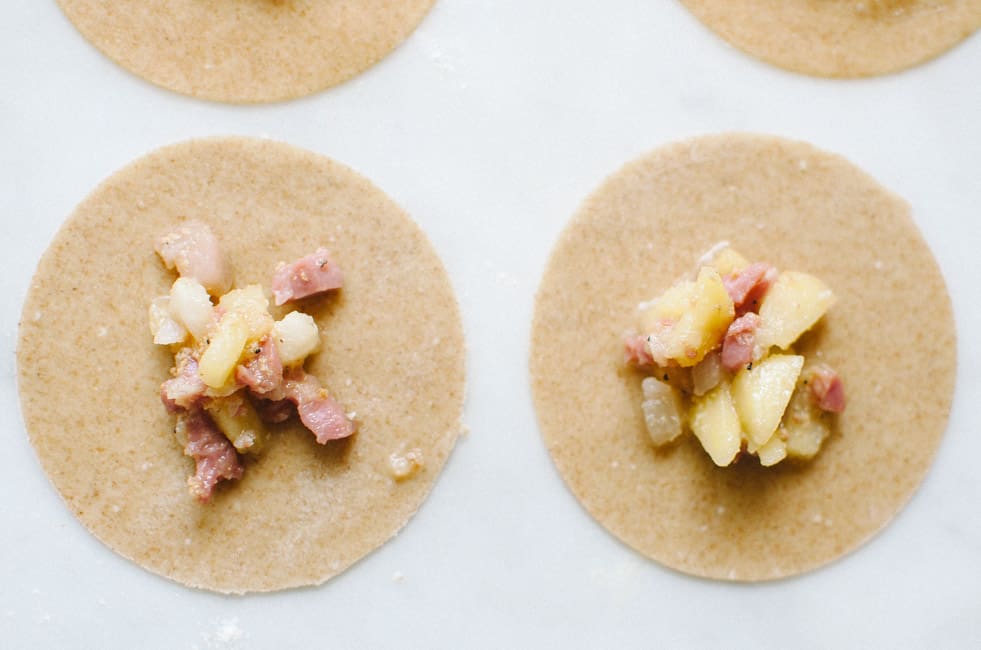
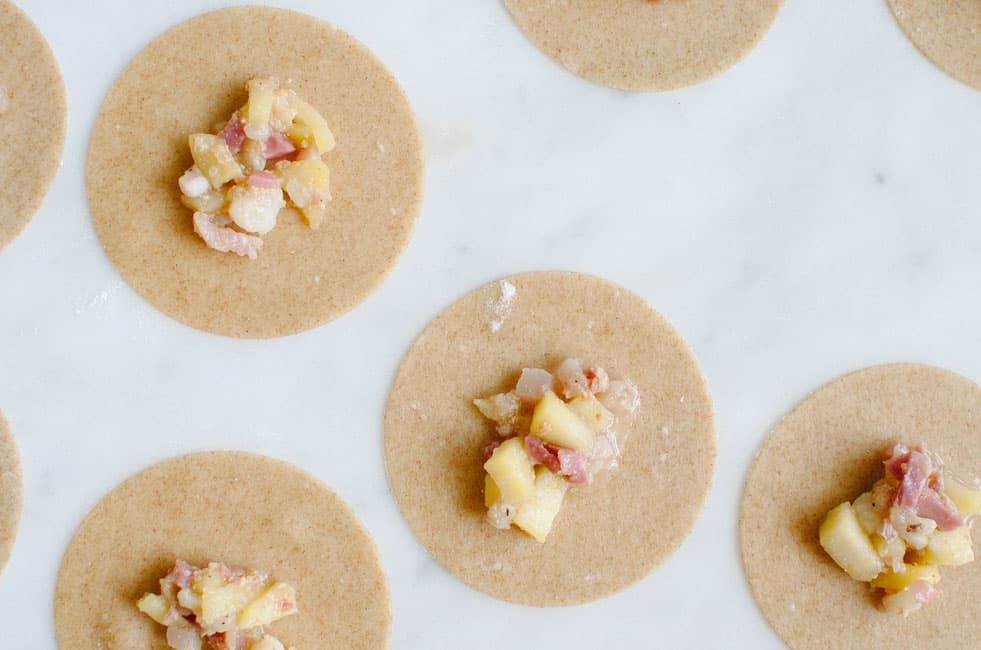
- Add minced pancetta to a medium-sized skillet and sauté over medium heat. Once pancetta changes color, add cubed apple and pear. Cook until pear is soft, but not too mushy. Add a sprinkle of sugar, salt, and pepper. Remove skillet from the heat, add crumble amaretti and transfer to a plate.
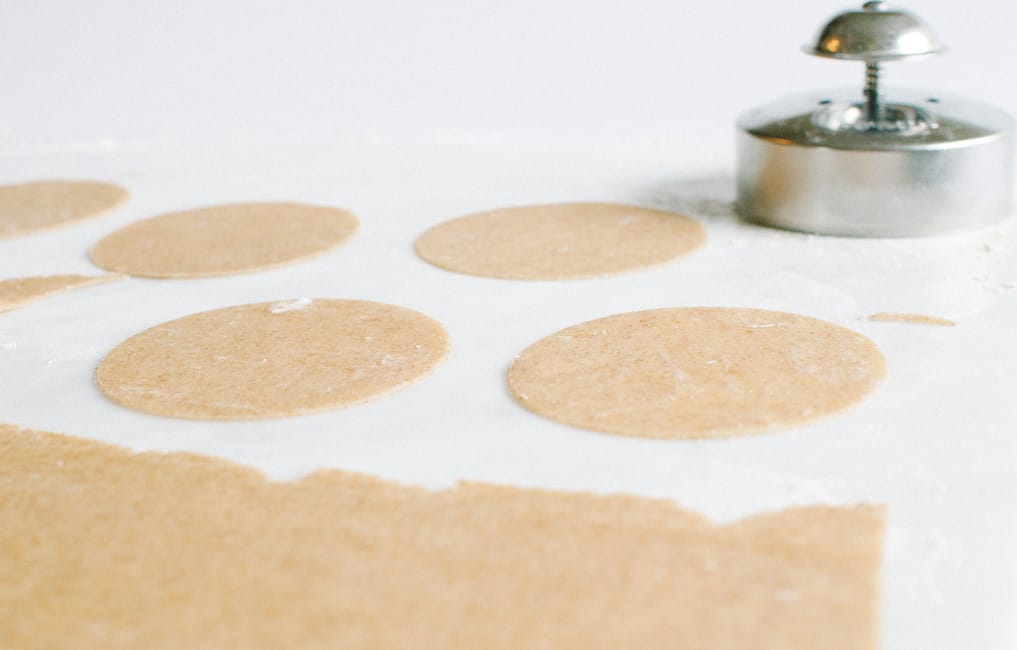
- Take dough out of fridge and roll it with a rolling pin or a pasta machine until it becomes thin (see photos above), adding a bit of flour if necessary (not too much!). Cut rolled dough in 3.5 inch (9 cm) rounds.
- With a teaspoon, place a small dose of filling in the center of each round. Brush some water on the outer part of the round. Fold round in half, forming a dumpling and making sure no air is trapped inside. Press the edges together to seal them tightly.
- Bring a pot of salted water to a boil.
- Melt butter in a large skillet and set aside.
- Gently place the cjalsons in batches in boiling water. Remove them with a slotted spoon once they come to the surface and transfer them in a skillet with melted butter over low heat. Cook for about 2-3 min, turning them gently. Sprinkle with cinnamon, pepper and parmesan cheese.
Spaghetti with Calamari
My husband and I love going grocery shopping together. Although I’m sure it may sound boring to most, we have fun looking at products (especially cheeses), being drawn by cool-looking and colorful packaging and getting inspiration for new recipes. We’re like kids in a candy store and I seem to be able to add to the experience by doing strange things that either make him laugh out loud or roll his eyes. In fact, American grocery stores have often offered me opportunities to learn, laugh, and reflect. Here’s a list of things that happened to me while shopping for food:
1) Spending at least 10 minutes looking for disposable gloves to pick my vegetables and then realizing people here pick their veggies with their bare hands.
2) Conversely, wondering why the roll of plastic bags stands right next to the chicken section, while I nonchalantly put a package of chicken breasts straight in the cart.
3) Trying to order prosciutto in hectograms.
4) Entering a cashier lane from the wrong side (it sadly still happens).
5) Being mesmerized by exotic and colorful foods like Doritos, Pop-tarts and Strawberry Marshmallow Fluff….impulsively buying them and, only after the first bite, reading their huge list of artificial ingredients. Yet still chowing down on them while being crushed by guilt.
6) Being puzzled at the idea that people would buy a product that claims to “taste like the real thing”, instead of getting the “real thing”.
7) Missing the European insert-a-coin-to-get-a-cart-and-get-your-coin-back-by-returning-the-cart system when I see shopping carts abandoned in the parking lot and waaaay too close to my car.
8) Lingering in front of the fish department, desperately looking for fish with their heads on.
9) Trying to bag my own groceries (as I would in Italy) and getting weird looks by the person whose job is actually to bag my groceries (oh. I thought he was just standing there!)
10) Whispering to my husband while in line to pay at Trader Joe’s: “is it okay if we use Whole Foods shopping bags here?” (like that would the cashier’s feelings! Total paranoia, I know.)
Although I’ve been in the States for some time now and I’m no longer a “fish out of water”, I seem to still be able to do awkward things that inevitably amuse or embarrass my husband. Just like when he overheard me asking the fish department guy this exact question:
“Do you have tentacles?” [read with cute voice and a light Italian accent]
I’m not sure if it was for my accent or the generic question (I’m pretty sure he thought I was asking if he had tentacles somewhere in his body), but the guy looked at me strangely and it took him awhile to understand I wanted squid “legs” (or arms??). My husband overheard the whole thing and barely kept his composure as he approached me.
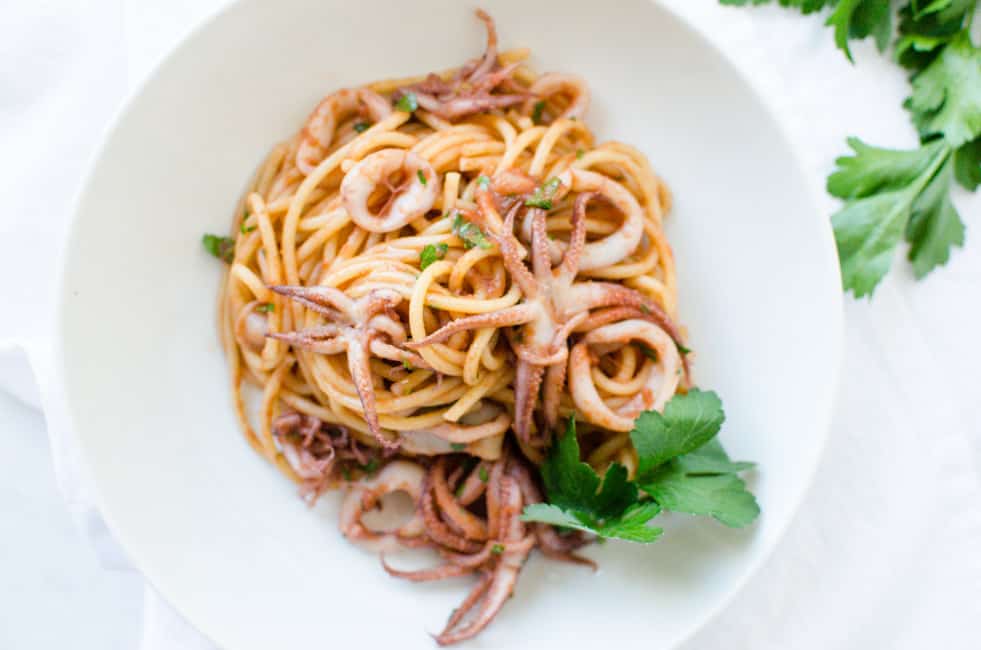
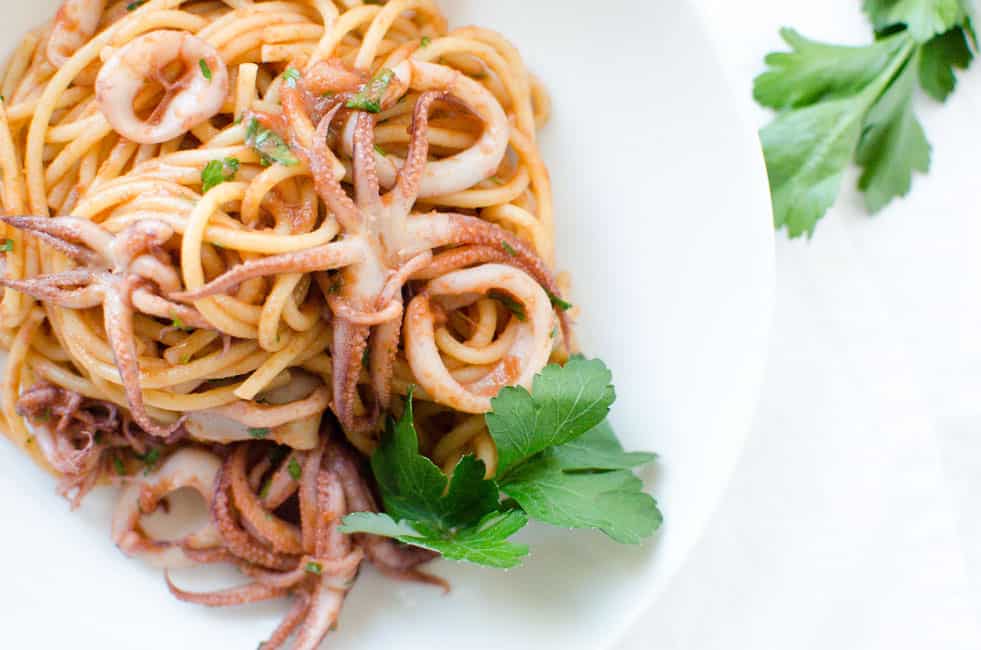
Okay. End of my funny grocery shopping stories. The tentacles ended up with a bunch of squid rings in a delicious pasta with calamari –a fresh, simple and flavorful dish. Eating fresh seafood always puts me in a good mood. Eating squid tentacles, in particular, will always put a smile on my face.
SPAGHETTI WITH CALAMARI
Spaghetti con calamari
Servings: 2 | Prep time: 10 min | Cook time: 15 min
INGREDIENTS
190 g (6.7 oz) spaghetti
a drizzle of extra-virgin olive oil
2 cloves of garlic
1 cup of strained tomatoes (no salt added, like Pomì)
1/2 lb clean squid tentacles + tubes, sliced in rings
coarse salt
freshly ground black pepper
a handful of parsley, chopped
red pepper flakes, to taste
INSTRUCTIONS
1. Bring a pot of salted water to a boil and add spaghetti.
2. In the meantime, heat extra-virgin olive oil in a medium-sized skillet over medium-high heat. Add garlic and let it sizzle briefly.
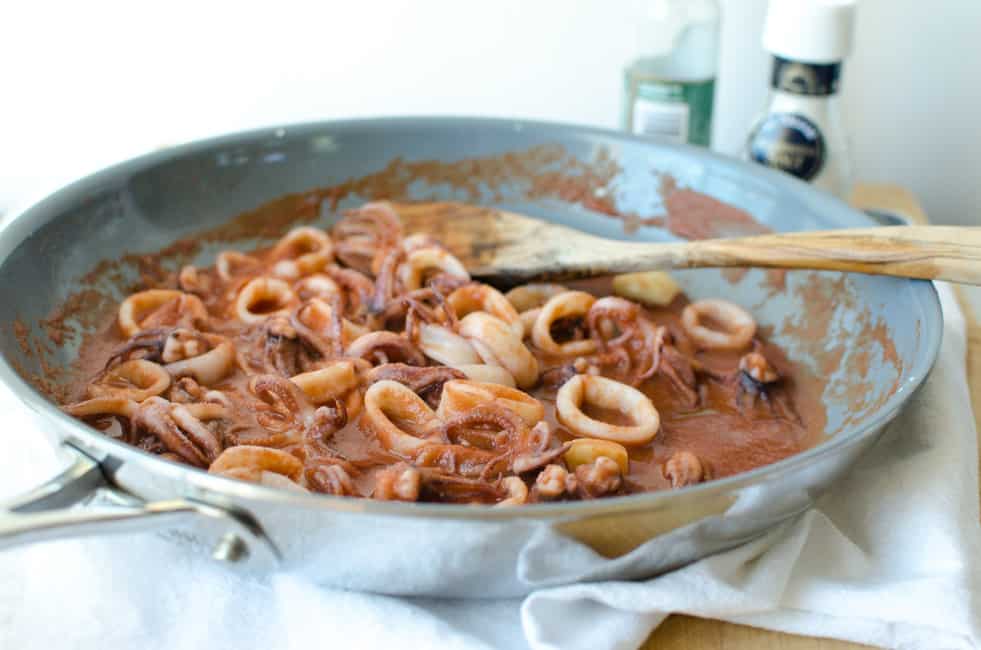
3. In the same skillet, add tomato sauce and cook for 6-7 minutes, until sauce becomes thicker. Add squid tentacles and rings and cook for 2-3 minutes, until opaque. Add salt & pepper to taste and then remove pan from heat.
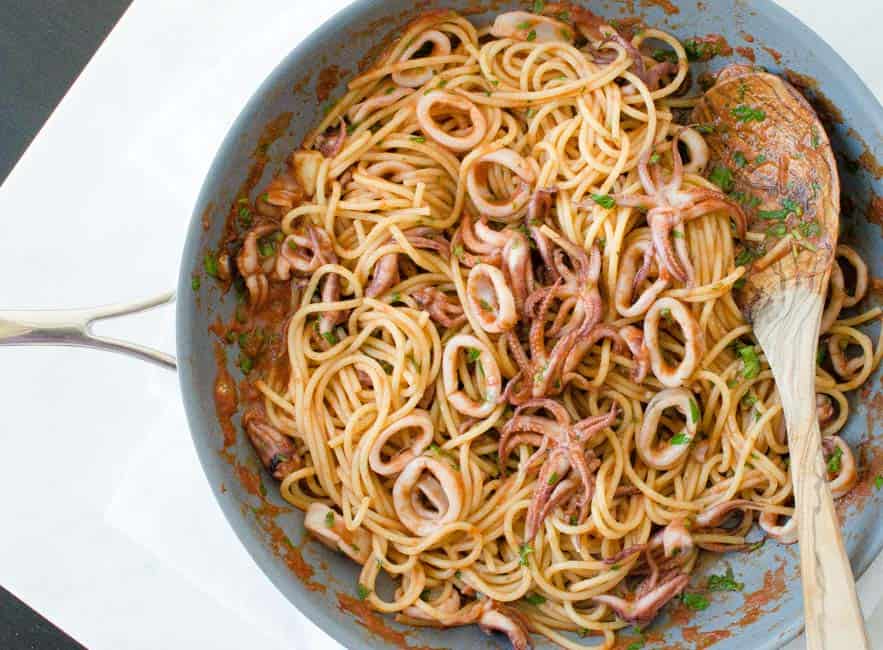
4. When spaghetti are a little firmer than al dente, drain them. Place the skillet with the sauce back on the stove over medium-high heat, adding drained pasta in it.
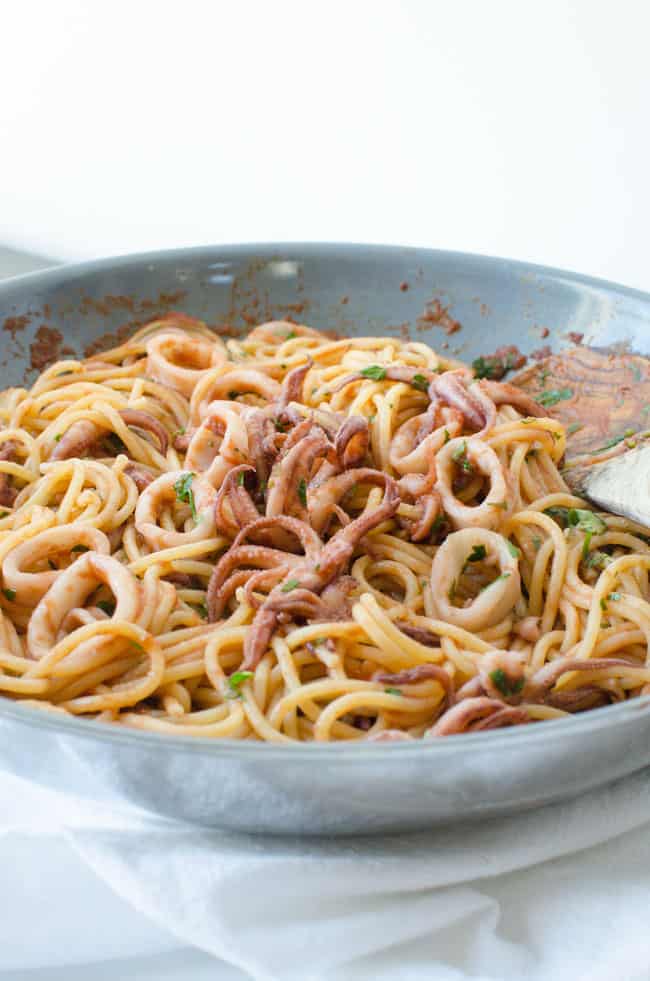
5. Add chopped parsley, stir and cook for a couple more minutes. Sprinkle with red pepper flakes, to taste. Remove garlic cloves from pan and serve pasta immediately!
Buon appetito!
-Lisa
Tagliolini with Prosciutto di San Daniele
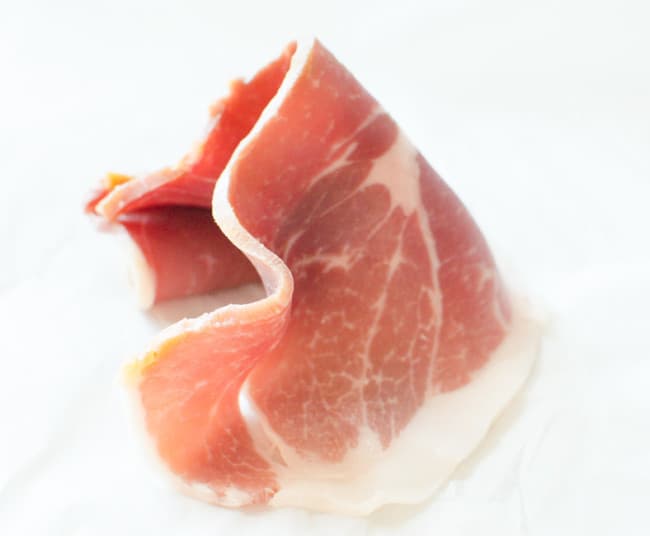
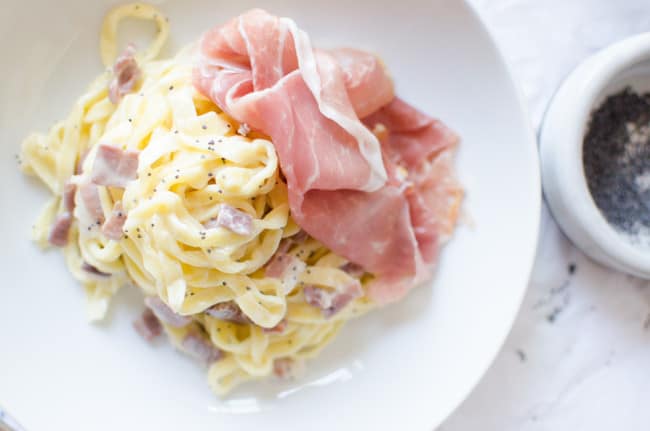
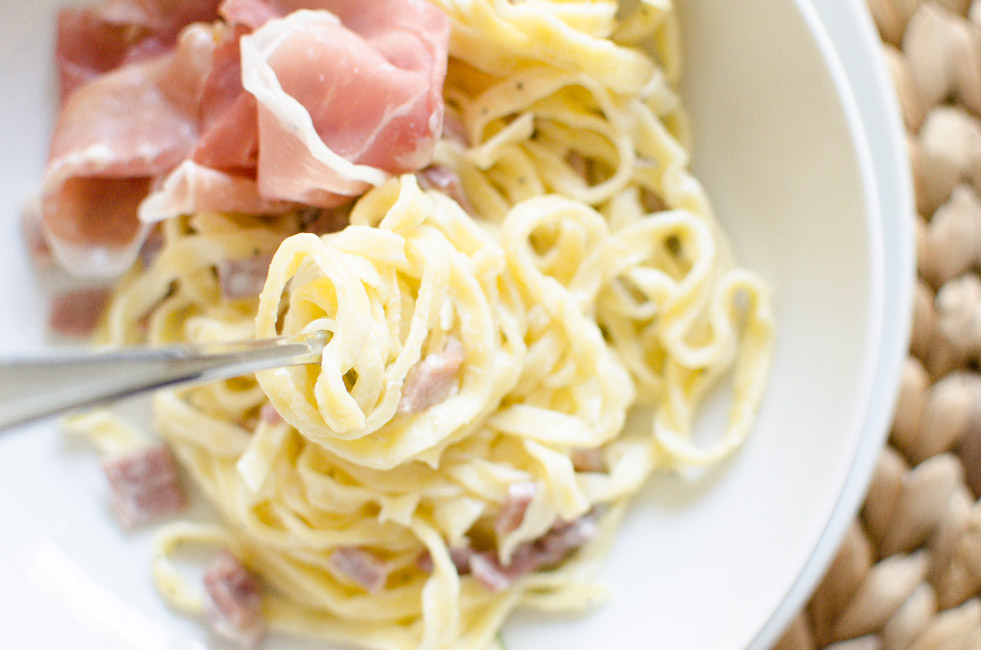
One way to make my husband really, REALLY happy is to prepare this pasta dish for him. He adores prosciutto di San Daniele and I’m pretty sure my family’s love and massive consumption of this amazing cured meat rubbed off on him. Since I can remember, we’ve always kept a whole prosciutto in our basement fridge and, when needed, we simply pulled it out and sliced it up. The standard way to receive guests has always been to serve a huge platter of freshly sliced prosciutto, with some bread sticks and a glass of Prosecco or Friulano wine. What’s called prosciutto here is actually called “prosciutto crudo” in Italy. It’s a genuine, high-quality and dry-cured meat, simply made of Italian pork and sea salt. Unlike many other cold cuts, you won’t find any other ingredients such as nitrates, water or sugar on the prosciutto label. This wonderful pasta recipe calls for Prosciutto di San Daniele. Although Parma ham is probably more available here in the States, I highly encourage you to go out of your way and find San Daniele instead. There’s also no other prosciutto that combines salty and sweet in the amazing way that San Daniele does. It just melts in your mouth. Make sure you ask for paper-thin, but not shredded slices! Maybe if you’re lucky, the person working the slicer will offer you a free sample as they get the thickness right. It happened to us at Whole Foods and I clumsily dropped half of the slice as my husband handed it to me. I nearly cried.
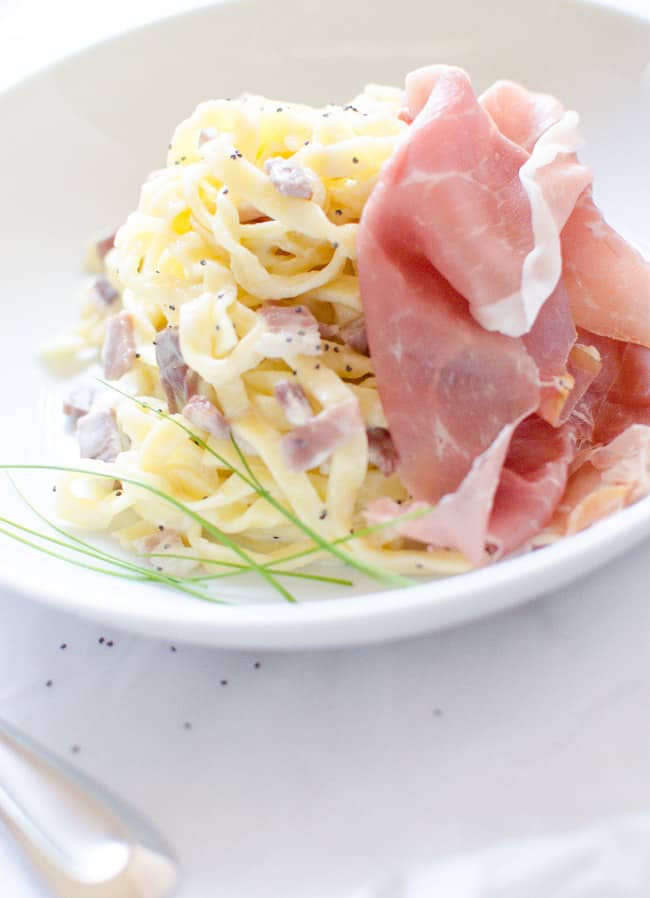
TAGLIOLINI WITH PROSCIUTTO SAN DANIELE
Servings: 2 generous portions | Prep time: 10 min | Cook time: 4-5 min
INGREDIENTS
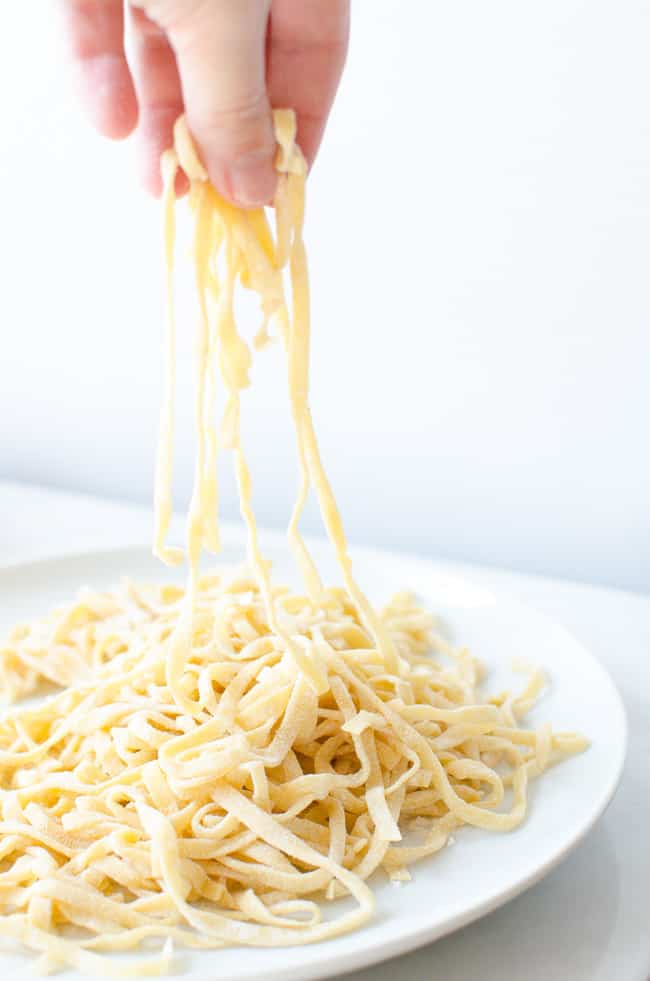
200 g (7 oz) tagliolini (or taglierini) egg pasta
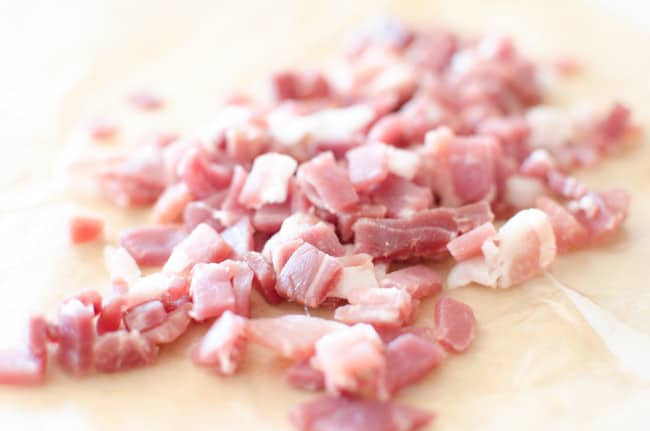
one 1/8 inch-thick slice (about 100 g–a little less than 1/4 lb) of Prosciutto di San Daniele, coarsely minced
2 paper-thin slices Prosciutto di San Daniele to lay on top
20 g (1 1/2 Tbsp) butter
100 ml (1 scant half cup) heavy cream poppy seeds (optional)
chives to garnish
INSTRUCTIONS
1. Bring a pot of salted water to a boil.
2. Heat butter in a pan, add minced prosciutto and let it saute for 1-2 minutes, until it changes color. Add heavy cream, stir and remove from heat.
3. Add tagliolini in boiling water and cook until al dente, for 3-4 minutes. [If the pasta is homemade, cooking time may vary based on how thin you rolled it; if the pasta is store-bought, follow the cooking instructions on the package. The best way is to always test-taste it before draining it.]
4. Drain the tagliolini and pour them in the pan with the sauce. Stir and let it saute for few more minutes, until sauce is partially absorbed.
5. Serve tagliolini on a plate and sprinkle some poppy seeds on top. Arrange a thin slice of prosciutto on top and garnish with chives.
Buon appetito!
-Lisa
Fresh Egg Pasta
Making pasta is probably one of the most iconic scenes of the Italian culinary tradition. Several decades ago, Italian women used to regularly make pasta from scratch, as did my great aunt and grandmother. All they needed were eggs, flour, a rolling pin…and strong arms.
Times have changed since then and life has become much busier. These days, even the average Italian family finds it easier to grab a package of tagliatelle from the pasta aisle. There’s nothing wrong with pre-packaged pasta. I, myself, buy it in bulk when I’m able to find my favorite brand. Store bought is fast and convenient, but it’s not as good as the one you can make at home, from scratch. Like for many other foods, the fresh stuff is always better.
Luckily, in some Italian households this art is still preserved, practiced, and handed down from one generation to another. Growing up, I watched my great aunt and my mother making tagliatelle noodles every once in a while. There was usually a really nice sauce to go with it, one that called for fresh pasta–like ragù or duck sauce. We typically used an electric machine and making pasta was a fun activity: I was in charge of covering the freshly rolled noodles with dishtowels to prevent them from drying out. As I helped, my mother never failed to point out: “See? It’s so easy to make! You only have to remember to use one egg for every hundred grams of flour”. That was pretty much the dose for one generous serving–it was a fairly easy recipe, and that ratio stuck with me immediately.
Following my mother’s suggestion, I replaced half flour with semolina flour in order to get a more rustic and hearty texture. Semolina flour is sold in most grocery stores. If you can’t find it, it’s okay–just use all purpose flour and stick to the 100g/1 egg rule and you’ll be fine. The recipe is super simple and the technique can be learned quickly. Once you get the basics, you’ll be able to make it with more confidence and, sooner than you can imagine, you’ll start stashing it in your freezer (granted it’s always better to eat it fresh!).
Needless to say, I’ll soon share a recipe for a nice sauce to go with your homemade pasta. In the meantime, have fun getting covered in flour and working out those forearms!
HAND-ROLLED FRESH EGG PASTA – PASTA ALL’UOVO TIRATA A MANO
Servings: 2 | Prep/rest time: approx 1 hr 15 min| Cook time: 2-5 min (varies based on thickness)
INGREDIENTS
100 g (3.5 oz) all purpose flour (or even better, finely milled Italian flour – “Farina Tipo 00”)
100 g (3.5 oz) semolina flour
2 large eggs
1 pinch coarse salt (optional)
COMBINING
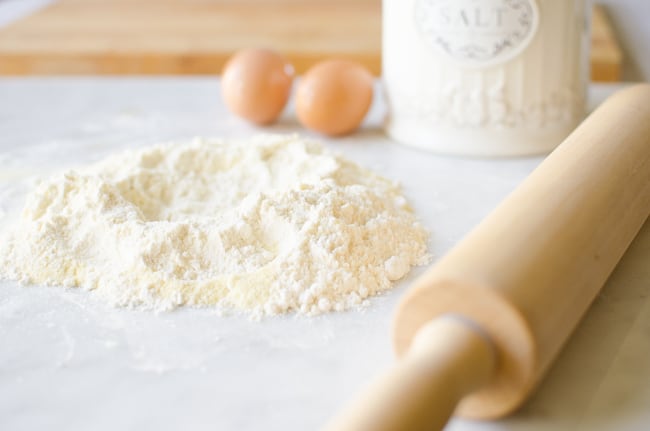
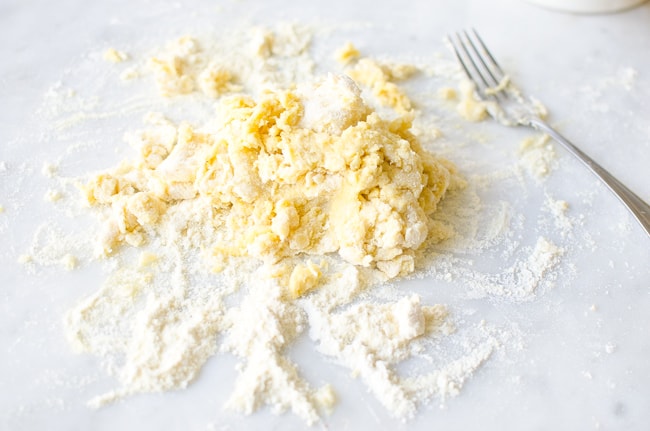
1. Sift together semolina flour and all purpose flour on a clean working surface and form a well in the center.
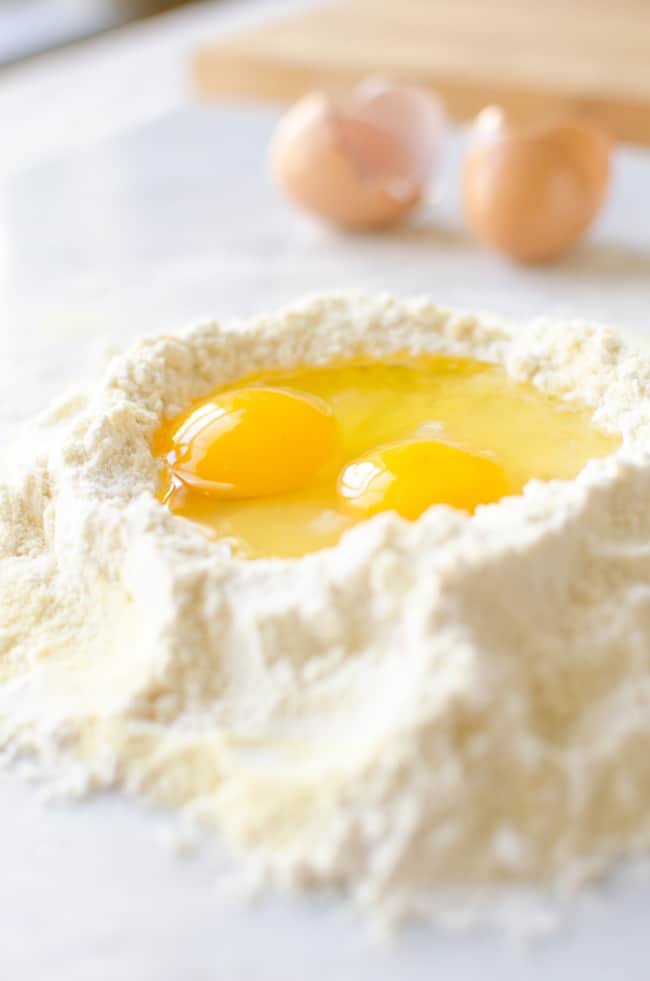
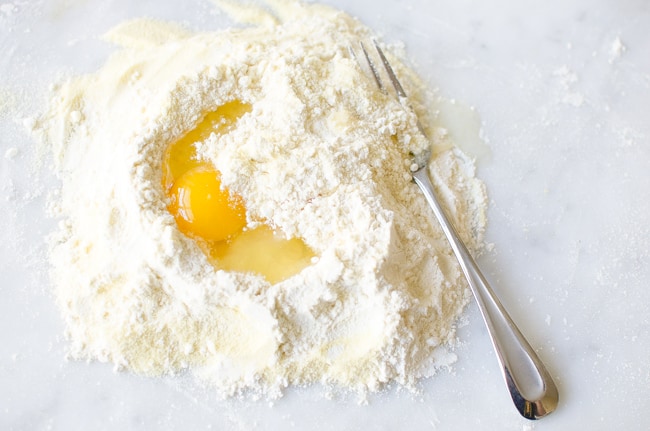
2. Crack eggs into the center and add a pinch of salt. Start mixing eggs with a fork, gradually drawing the flour from the borders towards the center.
KNEADING
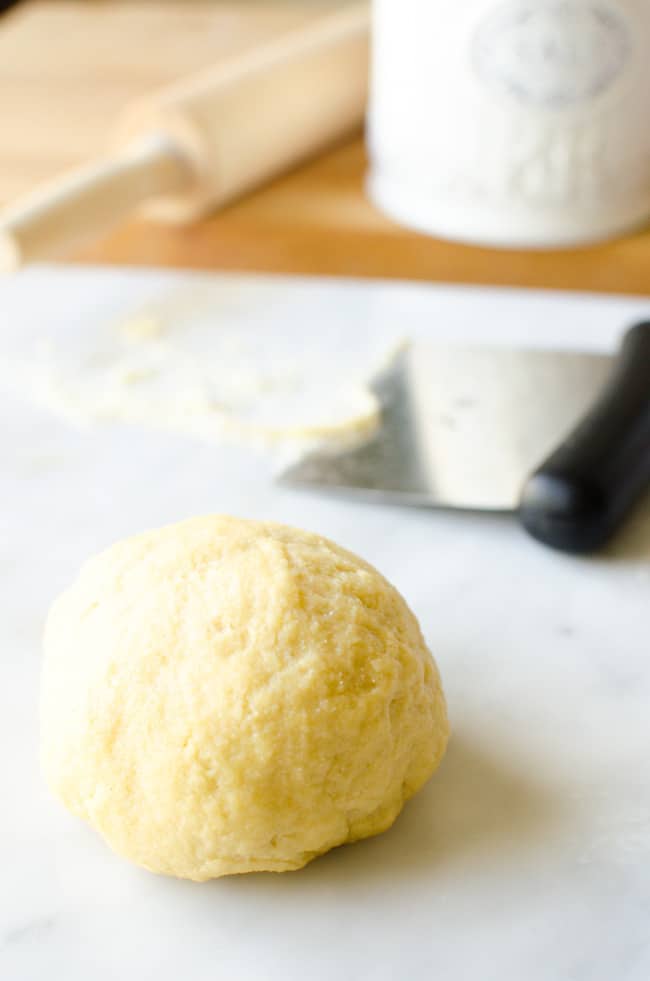
3. Bring all the dough lumps together with your hands and start kneading for about 10 minutes, until you obtain a smooth dough ball.
– Some factors like humidity and the size of the eggs can impact the moisture level of the dough and you’ll probably need to adjust the quantity of flour: don’t incorporate all the flour, if the dough won’t take it; on the other hand, if the dough is too sticky, gradually add small quantities of flour until you achieve the ideal texture.
-Kneading is the hardest part and the dough may seem hard to work at first. Don’t be alarmed; the dough will soften up once it has rested. You can also bang it on the work surface to help make it more elastic.
RESTING
4. Wrap the dough tightly in plastic wrap and let it rest at room temperature for at least 30 minutes.
ROLLING
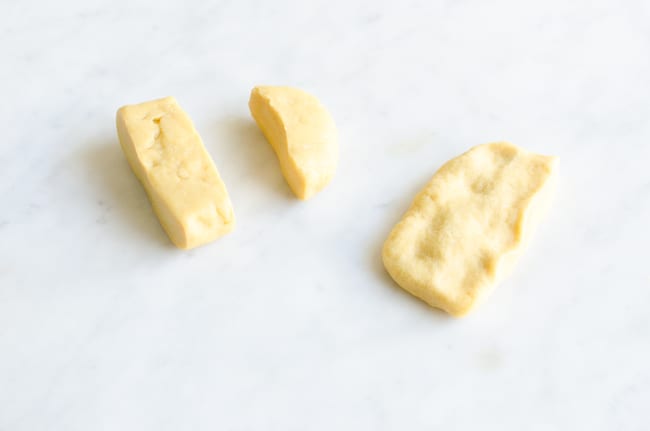
5. Once the dough has rested, divide it into 2 or 3 pieces. Take one piece and wrap the other ones in plastic wrap to prevent them from drying out.
6. Flatten the dough piece with your hands into a circular or rectangular shape.
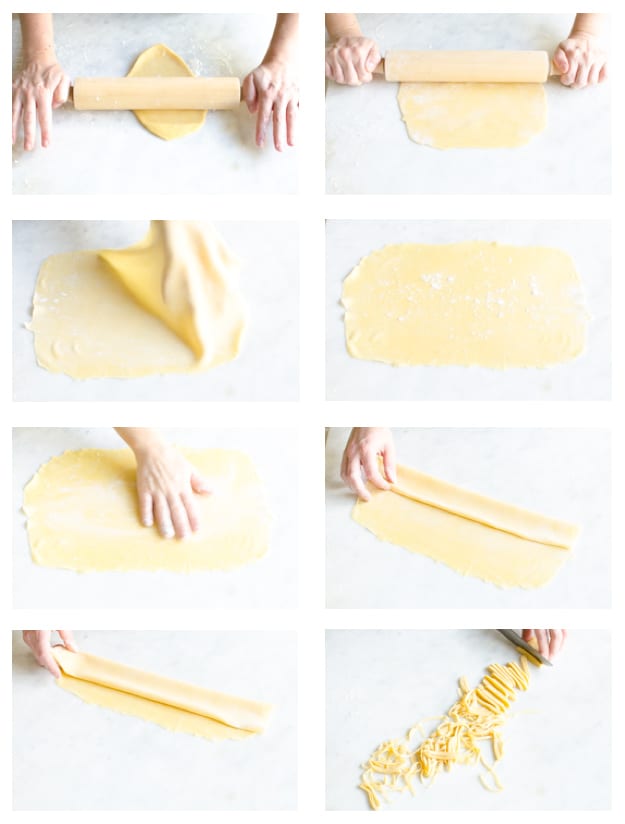
7. Lightly dust the dough with flour and roll it out with the rolling pin, applying pressure from the center forward, and releasing the pressure as you return back to the center. Repeat a couple of times. Turn dough disk 90 degrees (to ensure even thickness and shape) and lightly dust it with flour again (to prevent from sticking to surface or rolling pin). Repeat all these steps, until you obtain a very thin and elastic dough. If you are making lasagne, tagliatelle or tagliolini, roll dough to slightly less than .5 mm, which is a bit thinner than a credit card. If you are making ravioli, roll it even thinner.
CUTTING
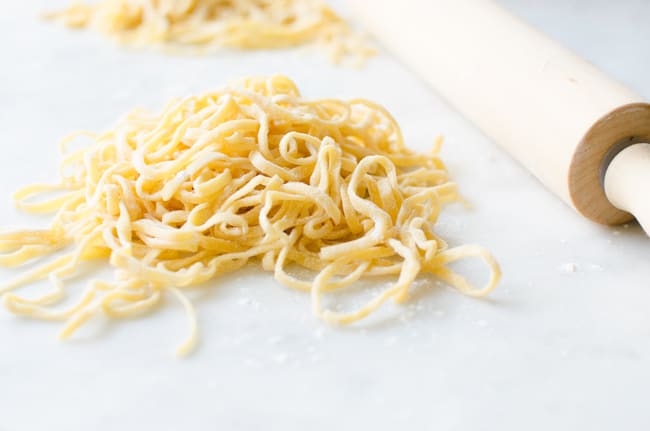
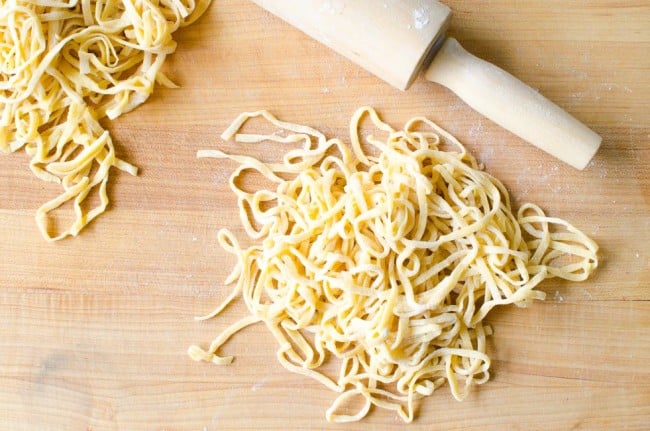
8. Take rolled dough disk and dust it generously with flour. Take one side and fold a strip about 1 1/2 inches, then fold it again over itself until you run out of dough (see photos). Slice the folded dough into strips as wide as you prefer. You can cut your pasta into a variety of widths, for the following shapes:
Tagliolini –> less than 1/8″ wide
Tagliatelle –>1/4″ wide
Pappardelle–> between 5/8″ and 3/4″ wide
9. Generously dust noodles with flour (or semolina flour) and place them on a tray lined with parchment paper and dusted with flour, until ready to be cooked.
Repeat the same steps for the remaining pieces of dough.
FEW MORE NOTES…
– Pasta dough gets dry pretty fast and once you roll it, you should cut it right away. If you don’t, cover it with a clean dishtowel.
– I recommend cooking fresh pasta right away but you can also freeze it. First, let it harden on a tray lined with parchment paper; then, store it in a freezer bag.