Very EATalian

food, photography, italy

  • Home
  • About me
  • Recipes
    • Appetizers
    • Breakfast
    • Cheese & eggs
    • Desserts & Sweets
    • Drinks
    • Fish & Seafood
    • Holidays
    • Meat
    • Pasta & Gnocchi
    • Pizza & Bread
    • Rice & Grains
    • Side Dishes
    • Soups
    • Vegetarian
  • Italy
    • Behind the scenes
    • Life in Italy
    • Travel
  • Contact
  • SEARCH

Spaghetti with Tuna, Lemon, and Creamy Stracciatella Cheese

July 11, 2020 By very EATalian Leave a Comment

Hello friends, 

Long time no see! A lot has happened in the past month. We’re back in the US after a whole year spent in Italy, near my family. I can say our hearts and bellies are happy and full: so many shared moments with people we love; such familiar and unforgettable flavors! Oh, I miss everything and everybody so much already.

We ended up gravitating around Northeastern Italy, only stepping once outside the Italian border (to eat at a restaurant in a little Slovenian village). Even if we initially thought we’d travel more, our year in Italy was very rich (and enriching) , regardless!

We loved being close to the sea and to the Alps! The opera in Verona, a weekend in Milan, our summer vacation in a luxury hotel in Alto Adige, a week at my favorite beach, getting lost in Venice for the hundredth time were just some of the highlights of our time there. The most cherished moments, though, were the simplest of all.

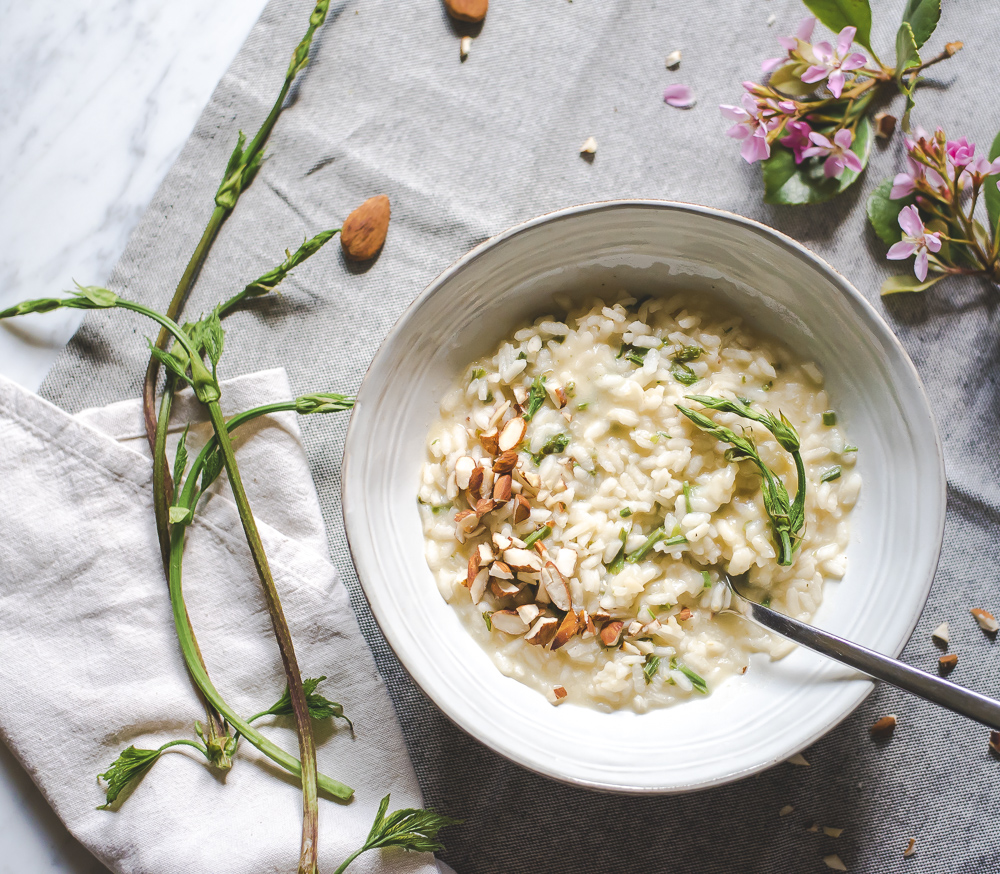
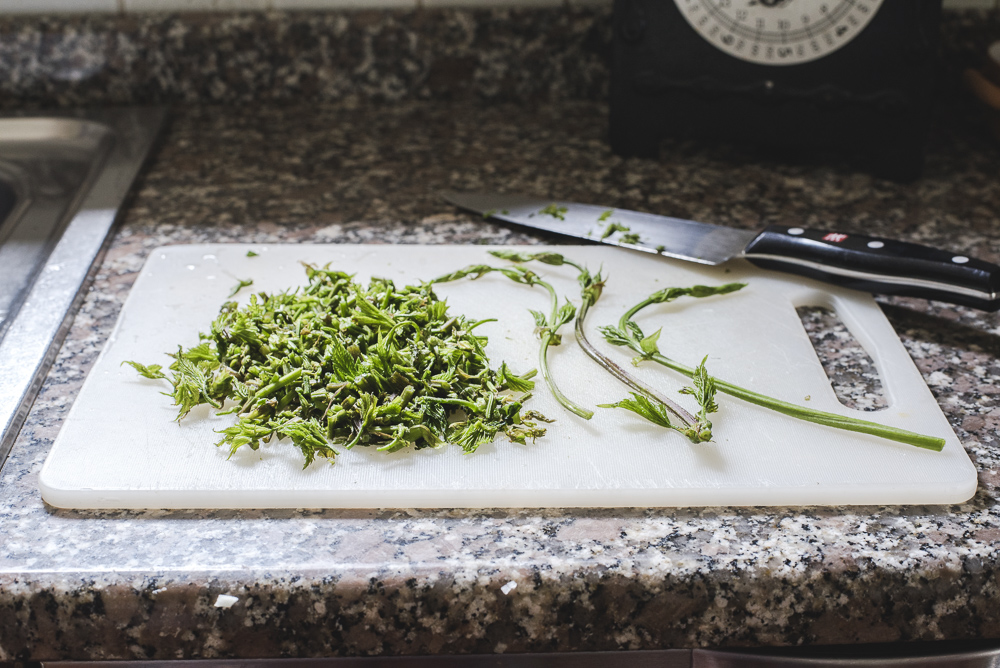
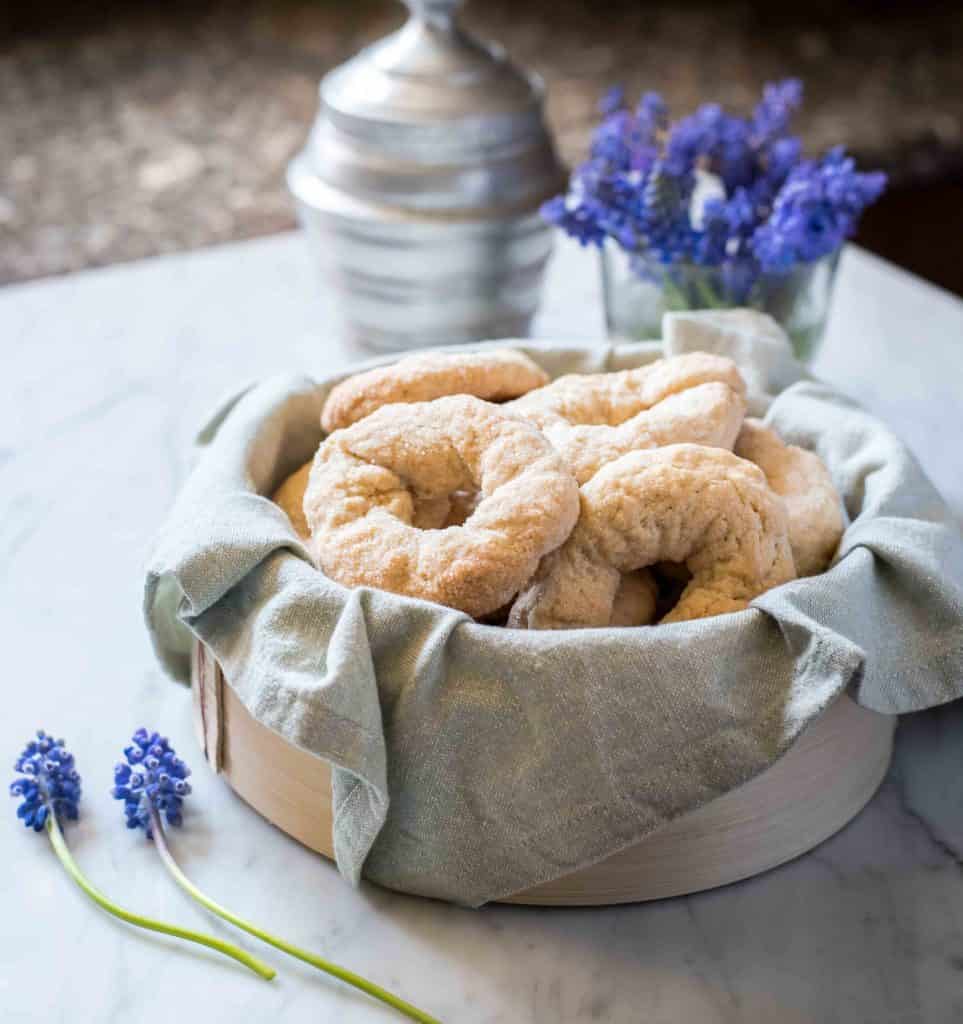
I’m thinking of something as simple as getting a brioche and a cappuccino at a local cafe or riding our bikes through the quiet roads around the house, just before the sun disappeared behind the mountains. I loved our dinners under the porch — lately they were on high demand because Olivia loved the colorful string lights. Seeing old friends, eating gelato & pizza, strolling around markets, foraging for wild herbs, shopping at my favorite shoes stores…the list goes on and on! Lastly, the best thing of all was seeing Olivia growing up close to her nonni, aunts, uncles, and cousins. She had lots of attention and love coming from all over the place…I’m not sure how I can replace that, but it was a real blessing! During our time there, she grew into a chatty, smart, and curious toddler.

Now we’re off to a new start and we’re slowly getting used to our new life here in Alexandria, VA. Readjusting this time is a bit harder because of all the restrictions related to COVID. Thankfully, we still have friends here and we also found a house we’ll soon move into. I can’t wait to settled and get all my kitchen stuff back! In the meantime, I have some recipes that have been in the back burner for a long time. 

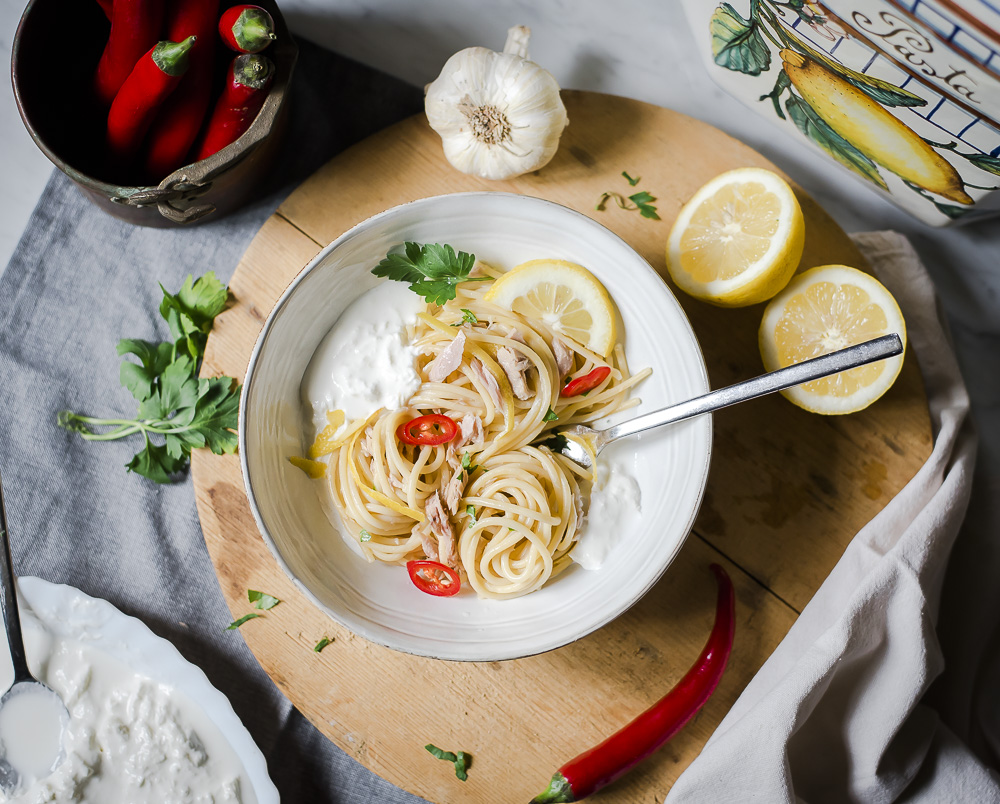
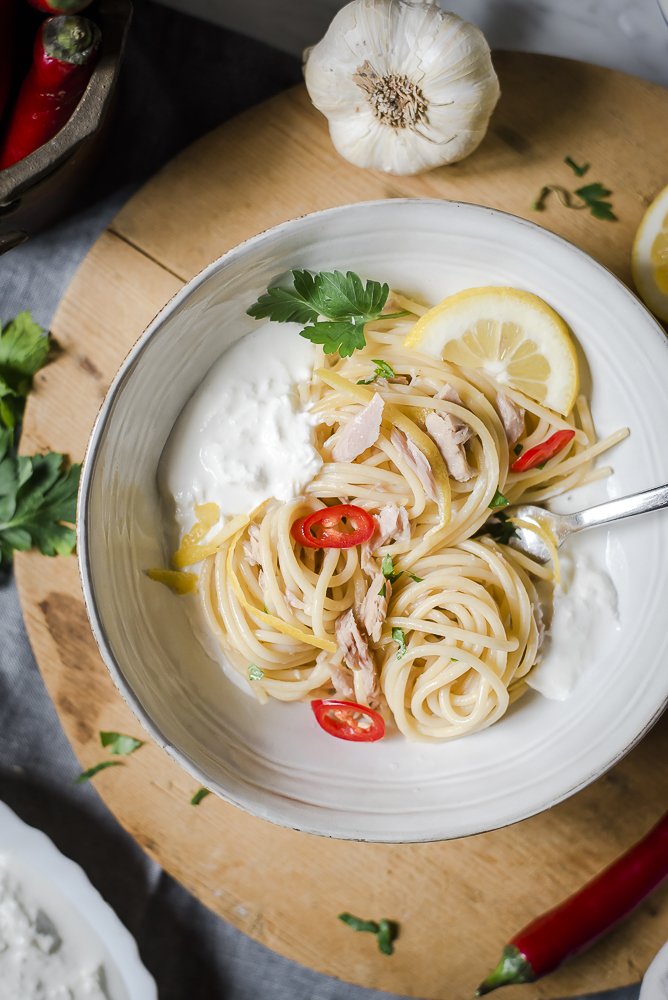
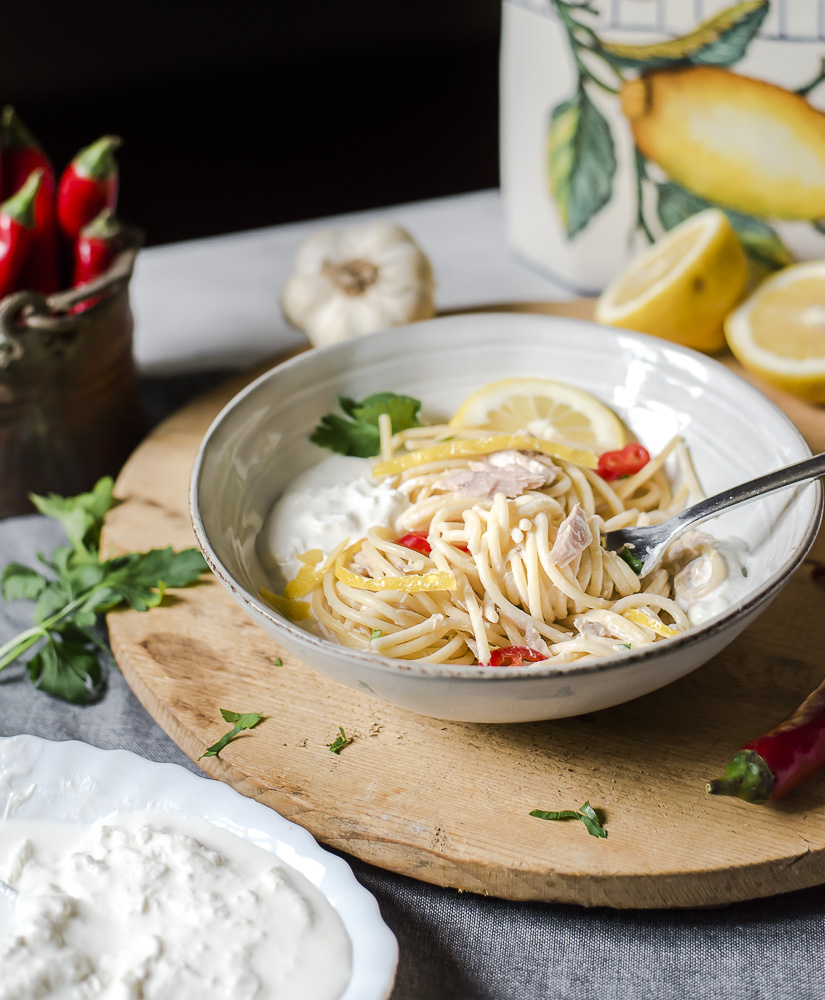
Pasta with Tuna and Lemon is definitely a classic in Italian cuisine. This recipe is a keeper and also a lifesaver because it’s easy, quick, and tasty. We resorted to it on multiple occasions during our last weeks in Italy and even here in our temporary apartment. The quality of tuna is really important, so make sure to use the best you can find. I love to add luscious and creamy stracciatella to this dish: it goes so well with the zesty lemon and it balances out the heat from the chili peppers.

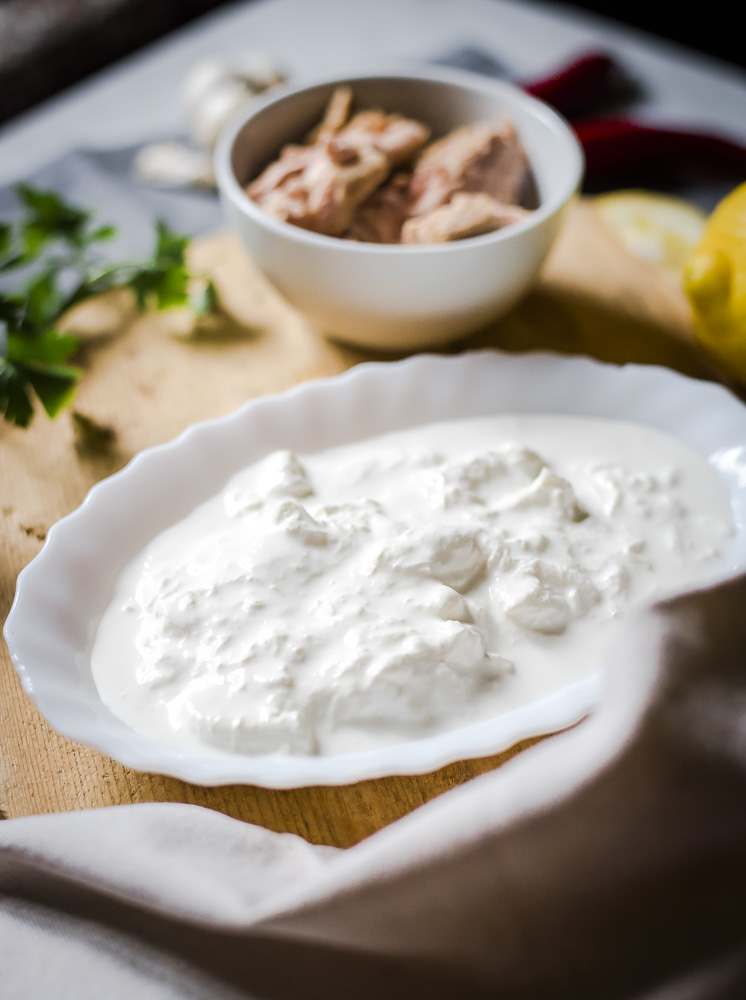
Just in case you’re not familiar with it, stracciatella is the soft, delicate and creamy center of burrata — it’s basically what makes burrata so good! This heavenly and pillowy soft cheese is a mixture of shredded fresh mozzarella curd and cream. I know it’s gaining popularity outside of Italy, so I encourage you to look for it at your local specialty store. If you can’t find it, you can easily replace it with her more famous sister, burrata.

This recipe can be enjoyed any time of the year,  but I particularly love it for the summer. It’s so fresh and so tasty!

Spaghetti with Tuna, Lemon and Creamy Stracciatella, Cheese | Very EATalian
Print

SPAGHETTI WITH TUNA, LEMON, AND CREAMY STRACCIATELLA CHEESE

Total Time 15 minutes
Author Very EATalian

Ingredients

  • 320 g (11.5. oz) spaghetti
  • extra-virgin olive oil
  • 1 garlic clove
  • 1 organic lemon juiced and zested
  • crushed red pepper flakes OR a fresh red hot chili pepper (seeded and sliced)
  • 300 g  (10.5 oz) good-quality tuna in extra-virgin olive oil drained
  • 1 Tbsp fresh parsley chopped
  • stracciatella cheese in desired amount, at room temperature

Instructions

  1. Bring a pot of salted water to a boil. Add spaghetti and cook until al dente. While pasta is cooking, prepare the “sauce”.

  2. In a wide sauté pan, over medium heat, add a drizzle of olive oil and a clove of garlic. Let it become fragrant and then add chili pepper sliced (or red pepper flakes), lemon zest and 1/4 cup of cooking water from the pasta pot. Cook briefly and let the liquid evaporate. Then add the tuna and the lemon juice, and cook for just a couple of minutes. Remove from the heat and let the flavors mingle until the pasta is ready.

  3. Drain the pasta and transfer to the pan. Turn on the heat, toss the pasta in the tuna/lemon sauce, until coated, for a minute or two. Remove the clove of garlic.

  4. Serve in bowls along with 1 or 2 tablespoons of stracciatella. Sprinkle with parsley. Before eating, make sure you stir in the stracciatella with your fork so that you obtain a nice creamy sauce. 

Filed Under: Pasta & Gnocchi Tagged With: easy, pasta, quick, summer, tuna

Risotto with Wild Hop Shoots (Risotto con Bruscandoli)

May 17, 2020 By very EATalian Leave a Comment

Did you think hops were just for beer? Brewers may be interested in the flower, but their delicate shoots are also a unique ingredient for risottos and frittatas!

In early spring, my family and I usually take walks in the country and look around for these thin green shoots growing wild in the Friuli and Veneto countryside. They look like delicate miniature asparagus and you can spot them near bramble bushes and scruffy vegetation areas dividing land properties. After we’ve gathered a big bunch of “bruscandoli”, we proudly carry them home and turn them into a delicious dish.

If you’re not into foraging, wild hop shoots are not an uncommon sight on market stalls in early spring.

Now, scroll down for a delicious risotto with wild hop shoots recipe!

  • Risotto with Wild Hop Shoots (Risotto con bruscandoli) | Very EATalian
Risotto with Wild Hop Shoots (Risotto con bruscandoli) | Very EATalian
Print

Risotto with Wild Hop Shoots (Risotto con Bruscandoli)

Cook Time 22 minutes
Servings 4 people
Author Very EATalian

Ingredients

  • 400 g (14 oz) Carnaroli or Arborio rice
  • a drizzle of olive oil
  • 1 small onion finely chopped
  • a bunch of wild hop shoots chopped (tougher ends removed)
  • 1.5 liter (6 cups) vegetable broth
  • a splash of white wine
  • 30 g (2 Tbsp) butter
  • 50 g (1/2 cup) parmesan cheese
  • 25 g 1/4 cup toasted almonds chopped
  • salt

Instructions

  1. In a heavy medium saucepan, heat a drizzle of oil.

  2. Add onion and chopped wild hop shoots and cook until softened. Add rice and cook, stirring frequently, until translucent, 2-3 minutes. Add wine and cook until it’s completely evaporated.

  3. Reduce heat and add a ladleful of broth, stirring frequently and allowing the liquid to absorb fully before adding more. Repeat the process, adding a ladleful of broth at a time. Cook rice until “al dente”, about 20 minutes.

  4. Remove from the heat, add butter and grated cheese. Mix well until melted and creamy. Add salt, to taste. You can stir in more broth to adjust consistency. Sprinkle some chopped almonds on top and serve.

If you make this recipe, please let me know how it turns out for you! You can leave a comment below the recipe or share a photo on IG or FB. Don’t forget to tag me with #veryeatalian! Grazie!

Filed Under: Rice & Grains, Vegetarian Tagged With: risotto, spring, vegetarian, wild hop

How to make Elderflower syrup

May 12, 2020 By very EATalian Leave a Comment

Jump to Recipe

More often than not, the extraordinary can be found in the small and simple things — the ones we sometimes overlook. 

In this region of Italy, elder trees are abundant and usually grow along the sides of roads and the perimeter of cultivated fields. When I was little, I had fun spotting them from the backseat of my parents’ car. It wasn’t always easy to recognize them from afar because sometimes they’d grow close to acacia trees (both of the plants’ blossoms are clusters of small white flowers). In my adult life, I never thought much of elder trees when I saw them blooming in spring — except they would bring back memories of my little “I spy” game.

Last summer, I tasted elderflower syrup for the first time during our vacation in South Tyrol. It was love at first sip! How can an extraordinarily delicate summery flavor come from such a tiny, common, almost mundane flower? Nature is indeed incredible.

I look at elder trees with different eyes now and I couldn’t resist the idea of making my very own elderflower syrup. I went on a little foraging expedition in fields behind my parents’ house, and I filled a couple of bags with these beautiful, scented flowers. It just took just a bit of cleaning, a lot of sugar, and many lemons. After letting it all sit in a large jar full of water for 48 hours, I filtered everything into a pot, added sugar and then brought it to a boil and cooked for another 5 minutes. I ended up with a delicious syrup that got me totally hooked. I’m obsessed!

WAYS TO ENJOY ELDERFLOWER SYRUP

Here are some ideas on how to use it your elderflower syrup…

  • Elderflower infused water: water, 1-2 Tbsp of elderflower syrup, ice cubes, and a mint leaf.
  • Elderflower lemonade: water, lemon juice, 1-2 Tbsp of elderflower syrup, ice cubes.
  • In cocktails: mix it with club soda or sparkling water, and top off with gin, vodka or prosecco (the Hugo cocktail is becoming a popular summer drink here in Italy!).
  • In desserts and cakes or simply in your whipped cream, to add a hint of delicate floral flavor. This copycat royal wedding cake made with elderflower and lemon is definitely something I want to make soon!

Before I leave you the recipe, here are some foraging tips.

HOW TO RECOGNIZE ELDERFLOWER

Elderflowers come from the elder (latin: Sambucus nigra). This plant grows all over the wold, and most commonly in the Northern hemisphere. The elder can be a shrub or tree and it can grow in a variety of conditions, but usually prefers sunny locations, like roadside hedgerows.

Elders produce flat-topped clusters of tiny, creamy-white flowers which usually bloom in late spring. You can easily recognize them for their sweet fragrance which inevitably attracts a lot of insects. Another way to recognize the elder tree is by looking at its leaves: they should be feather-shaped with toothed edges.

This botanical illustration is pretty clear and you can read more detailed information about this plant here.

HOW TO FORAGE FOR ELDERFLOWER

Pick a sunny and dry day and search in open fields, possibly away from traffic fumes and pesticide-free areas. Look for fresh blooms with open creamy white flowers, with soft yellow pollen. Remember these flowers wither fast, so make sure you use them soon after you harvest them.  

Gently shake the flower heads to remove any bugs and rinse them under cold water before using. Make sure you remove as much of the green stems as possible. While the flowers are edible, the leaves, stems, sticks, and roots are toxic and should be removed and avoided.

To find out how to make elderflower syrup, scroll down below to the recipe. I hope I instilled in you some curiosity for these wonderful flowers!

Print

Elderflower Syrup (Sciroppo di Fiori di Sambuco)

Prep Time 2 days 30 minutes
Cook Time 10 minutes
Author Very EATalian

Ingredients

  • 15-20 elderflower heads
  • 6 organic lemons
  • ½ – ¾ liter (3 c) water
  • 1 kg (5 c) sugar
  • 1   tsp apple cider vinegar

Instructions

  1. Gently shake the flower heads to remove any bugs. Rinse the flowers under cold water and remove all the green stems, keeping just the little flowers. While the flowers are edible, the stems and the leaves are toxic.

  2. Gently scrub the lemons under cold water. Remove the ends and cut the lemons in slices. 

  3. In a large glass jar, alternate a handful of flowers with a few slices of lemon, and top the last layer of flowers with lemons. Pour the water and gently press the lemons and flowers down to make sure they’re submerged in water. Close the lid or cover the jar with plastic film. Let rest in a cool place for 48 hours.

  4. Using a clean cotton dishtowel, strain your content into a medium pot. Give it a nice squeeze to get as much liquid as possible, making sure you squeeze the lemons, too. Add sugar and vinegar, and bring to a boil. Turn down the heat and cook gently for another 5 minutes.

  5. Let the syrup cool off and strain it into a bottle or glass container. Store it in the fridge.

  6. *The best and easiest way to enjoy elderflower syrup is to dilute it in water. A couple of tablespoons of syrup in a glass of water should be enough, but you can play with the quantity according to your taste. You can also add a few ice cubes and a leaf of mint.

Filed Under: DIY, Drinks Tagged With: elderflower, foraging, sambuco, sciroppo, spring, syrup

Pizza Bianca with Ricotta, Zucchini Blossoms, Baby Zucchini and Anchovies

May 6, 2020 By very EATalian Leave a Comment

Jump to Recipe

How many of you eat pizza on Fridays? I certainly do, and it’s one of those few sure things in life. It’s a sacred weekly date I try to protect from any possible interfering events.

Seriously, eating pizza on Fridays is a long-standing tradition in my family and it started as a reward for helping my dad with cleaning his office on late Friday afternoons. We’d pick up a huge pie of pizza on the way home and it was a real treat! It was the early 90s and take-out food wasn’t as popular as it is now.

Let’s rewind a few years back, to the 80s, when my mom would make pizza straight out of a box. Is anybody familiar with Pizza Catari’? It’s basically a pizza-making set which became popular in the 60s; it included flour, yeast and a can of tomato sauce! People loved it because it was super convenient and required little or no leavening time. The taste was somewhat distinctive and I remember it was fun taking things out of the box and helping my mom making it! Well, that was then…The good ol’ 80s. Thankfully, at some point, my mom started making pizza the more “orthodox” way — with selected and high-quality ingredients, and a technique she perfected over the years.

The tradition of eating pizza on Fridays is still alive and we alternate between making our own, and ordering it from our favorite local pizzeria. Believe it or not, between the two, my mom’s pizza is the one I prefer!

BREAKING OUT OF MY COMFORT ZONE: A TOMATO-LESS PIZZA!

When I eat pizza out, I love a thin and floppy crust in the center, with a puffy cornicione (rim). My toppings of choice are usually buffalo mozzarella and fresh cherry tomatoes. If I feel fancy, I ask for prosciutto crudo to be added at the very end.

When we’re home, I love a thick, puffy crust pizza with blistered mozzarella and a bunch of toppings. My favorite topping combos: pepper-onion-and-sausage, tuna & onion, ham & mushrooms, or…wait for it…. sliced hotdogs (Viennese). I make this one out of nostalgia because it was my favorite when I was a little kid!

This time I definitely stepped out of my comfort zone and I made a “Pizza Bianca”, using my mom’s dough recipe. I replaced the traditional tomato sauce with a layer of ricotta, some mozzarella and little bits of anchovy fillets. I then arranged the cutest baby zucchini and freshly picked zucchini blossoms on top. It turned out to be the springiest, prettiest, and freshest pizza I’ve ever made!

SOME TRICKS I LEARNED FROM MY MOM

While there’s certainly room for improvement and there’s so much to learn in the pizza-making department, I’m pretty happy with this recipe. It yields an airy and puffy crust with a crispy bottom — that’s how I like to eat it at home! Here below are some of the tricks I learnt from my mom, hoping they’ll be useful for you too.

Kneading the dough: I knead the dough for about 5-10 minutes (depending on how energetic I feel). When the pizza dough feels as tender as your ear lobe (I know you’re touching it right now!), you’ll basically have obtained the right consistency. I cover the dough and let it rest in a warm place.

Using the right flour: Italian flours are classified by numbers according to how finely they are ground from the roughest ground “tipo” 2″, to “1”, to “0”, and the powder-fine “00”.  Ideally, for pizza, you should use a medium-strength “0” flour, if you can get a hold of it. If not, Caputo “00” flour works well too, or you could even mix bread flour and all-purpose flour.

Proofing your dough: The longer the dough rests, the better it is. Pizzaioli let their dough rest for at least 24 hours (in the fridge). For this recipe, I opted for a shorter period of time: I used about half packet of yeast and I let the dough rest in a warm place for about 3 hours. Then I shaped the dough in the pan, covered it and let it rest another hour. The result was a nice light and puffy crust.

Baking : I bake my pizza at 250 C (485 F). To get a nice perfectly cooked crust, I place the pan at the very bottom of the oven for the first 8 minutes. Then I bring it up to the center of the oven to complete the baking. It’s generally recommended to add the toppings on the pizza (with the exception of tomato sauce) halfway through the baking. Sometimes I do that, sometimes I add everything at the beginning, sometimes I only add mozzarella halfway through. It’s totally up to you.

Ok now. Let’s make some pizza!

If you make this recipe, please let me know how it turns out for you! You can leave a comment below the recipe or share a photo on IG or FB. Don’t forget to tag me with #veryeatalian! Grazie!

Pizza Bianca with Ricotta, Zucchini Blossoms, Zucchini, and Anchovies | Very EATalian
Print

Pizza Bianca with Ricotta, Zucchini Blossoms, Baby Zucchini, and Anchovies

Cook Time 12 minutes
Resting Time 4 hours
Servings 2 people
Author Very EATalian

Ingredients

Dough

  • 500 g (4 cups) flour (250 g “Type 0” flour + 250 g “Type 1” flour; see notes for substitutions)
  • 300 g (1 ¼ cup) lukewarm water
  • 1/2 packet (3.5 g) instant dry yeast (I used Mastro Fornaio Pane Angeli)
  • 1 tsp sugar
  • 2 Tbsp extra-virgin olive oil
  • 1 tsp sea salt

Toppings

  • 200 g (7 oz) ricotta
  • 150 g (5 oz) low-moisture mozzarella
  • 4 baby zucchini (or 1 big zucchini) sliced
  • 8 zucchini blossoms
  • 6 anchovy fillets
  • Olive oil & salt for seasoning

Instructions

  1. In a medium bowl, add flour, water, yeast, sugar, and oil. Mix with your hands until combined, then transfer dough onto a clean surface. Knead dough until smooth, about 7 minutes. Add salt and continue kneading for 2-3 more minutes. When the dough is soft, shape it into a ball, and transfer it into a bowl. Cover with plastic wrap and let it rest in a warm place for 3 hours.

  2. Line a baking tray with parchment paper. Take your dough out of the bowl and transfer it on the floured counter. Using your hands, gently stretch and shape the dough to fit your baking tray, making sure not to stretch it too much. Transfer dough onto your baking tray, cover it, and let it rest for another hour.

  3. Turn oven to 250 C/ 485 F.

  4. Spoon your ricotta onto the shaped dough, leaving a 2 cm (3/4-inch) border. Season with salt. Arrange your zucchini flowers and baby zucchini slices on top. Drizzle with olive oil. Place the tray of pizza at the bottom of the oven and bake for 8 minutes. Remove from the oven and arrange mozzarella cheese evenly over pizza. Return tray to the center rack of the oven and bake until crust is golden (about 4-6 more minutes, depending on your oven). Top with basil, drizzle with more oil, if you like, and slice.

Notes

Servings: This pizza is for 2 generous servings or 3 smaller servings. Double the ingredients to feed 4-5 people. 

Flour: If you can’t find “Type 0” or “Type 1” Italian flour, you can substitute  with a mix of all-purpose and bread flour (50/50), or you could just use “Type 00” Italian flour (Antimo Caputo). 

Filed Under: Uncategorized Tagged With: pizza, ricotta, zucchini, zucchini blossoms

Simple and flavorful Pasta e Ceci

April 21, 2020 By very EATalian 2 Comments

Jump to Recipe
  • Simple and flavorful Pasta e Ceci (Pasta with Chickpeas) | Very EATalian

I’m having a moment with Pasta e Ceci (Pasta and Chickpeas). It’s a sort of Southern “cousin” of another bean-based pasta dish we make quite often around here:  Pasta e Fagioli soup.

Both of these delicious recipes have their merits: they’re equally humble, nutritious, and filling. My favorite thing about Pasta e Ceci is how all ingredients come together in a harmony of flavors. A fragrant clove of garlic and an aromatic sprig of rosemary set the perfect stage for the beautiful marriage between the bright pureed tomatoes and the hearty chickpeas.

Like many other Italian dishes, you can prepare Pasta e Ceci in many different ways, according to family and regional traditions. I personally like my Pasta e Ceci just like Emiko Davies does: I like it to be less of a soup and more of a pasta, with just enough sauce to call for a spoon. I also like to be generous with tomatoes and puree about 1/3 of the chickpeas I use. The rest of the chickpeas dots the pasta, adding textural interest to the dish.

The best way to go is obviously dried chickpeas. I took a little shortcut and used the canned ones, and the result was still delicious! Make sure you don’t discard the water, though, as it will be an important thickening and flavoring addition to the sauce!

Short pasta works well with this recipe. I scored some mixed-shape pasta at the grocery store and it turned out to be a great source of entertainment for Olivia. She spent a good amount of time sorting out the different shapes. She also got really sad when she realized she ate all her chickpeas and she had no more.

A drizzle of good-quality extra-virgin olive oil and a generous sprinkle of shaved Parmigiano Reggiano cheese will be the perfect final touches to your Pasta e Ceci. If you like a bit of heat (and I DO!), you can add a hint of peperoncino (chili powder).

So there you have it. This simple and flavorful Pasta e Ceci is kid-friendly, cheap, nutritious, filling, and just DELICIOUS. I hope I inspired you to make it, too!

If you make this recipe, please let me know how it turns out for you! You can leave a comment below the recipe or share a photo on IG or FB. Don’t forget to tag me with #veryeatalian! Grazie!

Simple and flavorful Pasta e Ceci (Pasta with Chickpeas) | Very EATalian
5 from 1 vote
Print

Simple and flavorful Pasta e Ceci

Pasta e Ceci (Pasta with chickpeas) is an incredibly satisfying and nutritious pasta recipe made of cheap pantry ingredients. The pasta is cooked in a delicious sauce made with chickpeas, pureed tomatoes, garlic, and rosemary. You’ll love this dish so much, you’ll want to make it again!

Servings 4
Author Very EATalian

Ingredients

  • 1 can chickpeas (don’t discard the water!)
  • 1 clove garlic smashed
  • 1 sprig rosemary
  • ½ can (7 oz or 200 g) pureed or chopped tomatoes
  • 300 g short pasta (I used mixed shape pasta)
  • extra-virgin olive oil
  • sea salt
  • freshly ground black pepper
  • chili powder (optional)

Instructions

  1. Heat a drizzle of olive oil in a medium saucepan. Sauté the garlic with the rosemary, until fragrant. Add the pureed tomatoes and let cook for about 3 minutes, on low heat.

  2. Add the chickpea liquid from the can and ⅔ of the chickpeas. In a separate small bowl, puree the rest of the chickpeas with a couple of tablespoons of water, to obtain a creamy, thick sauce. Add the pureed chickpeas to the sauce, too.

  3. Add 3-4 cups of water to the saucepan, until it becomes quite watery and then add the pasta and a generous pinch of salt. The pasta doesn’t need to be completely submerged by the watery sauce, but it needs to have enough liquid in which to cook. For this reason, you will need to add a couple more cups of water, as the pasta cooks. The cooking liquid will eventually reduce and cook down into a creamy sauce. Cook pasta until al dente, stirring occasionally.

    When the sauce becomes a nice liquid cream that’s not too thick, your Pasta e Ceci is ready.

  4. Add salt and pepper to taste, and serve with generous shavings of parmesan cheese and a little drizzle of olive oil. Make sure you serve it with a spoon!

Filed Under: Pasta & Gnocchi, Vegetarian Tagged With: cheap, garbanzo beans, nutritious, pasta, tuscany, vegetarian

Picnics and a Spring Quiche with Agretti.

April 11, 2020 By very EATalian Leave a Comment

Jump to Recipe
Spring Quiche with Agretti | Very EATalian

When the weather starts to get warmer and the flowers start to bloom and buzz with bees, all I want to do is lay a blanket on the grass and have a little picnic under the shade of a tree. Like I’ve shared before, there’s hardly nothing more exciting to me than moving meals to an “en plein air” location. Maybe it’s the fact it’s a new set-up each time, maybe because it’s a more relaxed way to approach food, or maybe it’s just the beautiful surroundings and sounds of nature creating the perfect backdrop. Even if the current quarantine confines us at home, we’re fortunate enough to have a porch and quite big yard with plenty of trees. Picnics can still happen!

What’s in our picnic basket, usually? Salami, bread, cheese, wine, ca va sans dire. We also love to prepare dishes that are portable and highlight ingredients the season has to offer (like peperonata in the summertime, or frittata with foraged herbs in the springtime). Quiches are a great picnic food because they’re portable and a wonderful “vessel” for any seasonal ingredient. Quiches are also my go-to weeknight meal when I have to use up what I have left in the fridge. Ham or pancetta, cheese, or veggies: a quiche will welcome them all. This is why I always keep ricotta and puff pastry in my fridge — a little trick I learned from my mom!

Spring Quiche with Agretti | Very EATalian

A NEW DISCOVERY: AGRETTI or MONK’S BEARD

Today I am particularly excited about a vegetable I only recently discovered, that’s just perfect for quiches (and frittata or pasta dishes) : Agretti!  I bought my first bunch the other day, out of curiosity. It’s definitely not a common sight up here in the North and even in other parts of Italy it seems to disappear rather quickly! Agretti is available only during spring, and for a short period of time — right for this reason, it’s considered a delicacy and cause of excitement.

Agretti is also known as Barba del Frate (Monk’s Beard in English, or Salsola Soda in latin). Native to the Mediterranean area, it can be easily mistaken for chives, but with slightly thicker and longer leaves. Agretti’s flavor is similar to spinach, but with more of a crunch and a brighter and fresher taste! A simple way to eat it? As a side dish, just sautéed with a drizzle of olive oil and a generous squeeze of lemon juice. Spaghetti with Agretti (cute rhyme!?) is also an easy way to enjoy it. I love how it twines itself up nicely with spaghetti, creating a very cool eye-catching effect!

SPRING QUICHE WITH AGRETTI

Making this quiche was super easy. I simply combined the cooked agretti with staple ingredients like ricotta, eggs and grated parmesan cheese. A bit of nutmeg, salt and that’s it! This Spring Quiche with Agretti is somewhat reminiscent of torta salata con spinaci or torta pasqualina.

If you like, you can make your own puff pastry but I prefer to use the store-bought one. It’s probably the ONE ingredient I buy “already made”. Here in Italy, you can easily find good-quality sheets of puff pastry in the refrigerated aisle of any grocery store. You can choose between square and round, and I’ve also seen some gluten-free options. I wish it was the same in the US!

.I love this quiche and I will definitely make it again for our next spring picnic. Now, let me dust off the picnic basket and pick out a great spot in our yard!

If you try this recipe, please leave a comment and share your photos on IG and tag me with #veryeatalian! Thanks!

Spring Quiche with Agretti | Very EATalian
Print

Spring Quiche with Agretti

Prep Time 20 minutes
Cook Time 20 minutes
Servings 4
Author Very EATalian

Ingredients

  • 250 g (9 oz) Agretti (Monk’s Beard) clean, ends trimmed
  • 1 clove garlic
  • extra-virgin Olive Oil
  • 200 g (7 oz) ricotta
  • 3 eggs (divided)
  • 50 g (1/2 c) grated Parmigiano Reggiano cheese
  • salt
  • a pinch of ground nutmeg
  • 1 sheet of puff pastry

Instructions

  1. In a medium size pan, over medium heat, add a drizzle of olive oil and a clove of garlic. Then add agretti and cook until it softens but still retains a little crunch to the bite, about 6 minutes. Add a pinch of salt, stir with a spoon and remove pan from the heat.

  2. In a medium bowl, make quiche filling by combining ricotta, 2 eggs, grated cheese, salt and nutmeg. Using kitchen scissors, roughly cut the cooled agretti into smaller pieces. Stir agretti into the quiche filling and mix until all ingredients are incorporated.

  3. Preheat oven to 200°C (390F) .

  4. Grease and flour a 25 cm-wide (10 inch) tart pan and line it with a sheet of puff pastry (if your puff pastry isn’t round, roll it out to properly fit the pan). Poke dough with a fork and then fill it with the agretti filling.

  5. Trim excess dough. Fold and pinch the quiche borders and brush them with a beaten egg. Bake the quiche for about 20-25 minutes, until golden. Serve warm or at room temperature.

Filed Under: Uncategorized

Ciambelle al Vino: Crunchy Wine Cookies

April 1, 2020 By very EATalian 2 Comments

If you want to try a new cookie recipe that’s simple and requires basic pantry staples — and have your house smell amazing — you have to try these Wine Cookies!

Italians call these cookies “Ciambelle al Vino”: they’re rustic-looking, lightly aromatic, crunchy, and not overly sweet. Hailing from the Roman countryside/Lazio region, these Wine Cookies were created out of necessity, as subsistence food. The dough is very simple and it’s based on a few key ingredients that any Roman family, rich or poor, would have in the house: wine, flour, sugar, oil, and salt.

A SIMPLE FORMULA BEHIND THE RECIPE

The recipe was passed to my family by our dear friend Rita. Now 83 years old, she was born near Rome and this is one of her favorite recipes.

There’s a simple formula behind these cookies: for each glass (or cup) of sugar, olive oil and wine, you’ll need 4 glasses of flour. Baking powder is optional and some people like to add anise seeds. 

After a bit of mixing, shaping, and dusting, they’re ready to be cooked in the oven. (The waiting part is the best part of all. The aroma coming from the oven will make your house smell beautiful! Who needs a scented candle when you have that??)

Just as soon as they turn golden, they’re pretty much ready to be taken out of the oven. You’ll end up with a rustic, yet delicious crunchy cookie, coated with sugar crystals and lightly infused with wine flavor!

HOW SHOULD YOU EAT THEM?

Traditionally, Ciambelle al Vino are served as an after-dinner treat, alongside a glass of sweet wine to soften the crunchy texture. However, we like to dip them in milk or coffee for breakfast, or have them as a mid-day snack.

I warn you: these Wine Cookies are truly addictive and kids love them too! Yes, they’re made with wine, but they can be eaten safely by your kids!

MORE REASONS TO LOVE THESE COOKIES

  • You can use any type of dry wine (red or white). I prefer to use white wine for a lighter taste.
  • They’re super kid-friendly: safe to eat and fun to make!
  • They keep for several days when stored in sealed container.
  • They’re dairy-free and eggs-free.

On a fun final note, I only recently learned one of my aunts, Zia Santina, has been making these for years…probably ever since she got the recipe from my mom! She bakes these cookies EVERY WEEK because my uncle likes them so much! Now, that’s love….and commitment. LOL.

Ciambelle al Vino: Crunchy Wine Cookies | Very EATalian
Print

Ciambelle al Vino – Wine Cookies

Servings 20 cookies
Author Very EATalian

Ingredients

  • 200 ml (3/4 c + 2 T) dry white or red wine
  • 150 g (3/4 c) granulated sugar, plus more for dusting
  • 180 ml (3/4 c) extra-virgin olive oil or vegetable oil
  • 8 g (2 t) baking powder
  • 1 pinch of salt
  • all purpose flour as called for (about 1/2 kg or 4 cups)

Instructions

  1. In a medium bowl, using a spoon, combine white wine, sugar, salt, oil, and baking powder. Add flour a little bit at a time. Start mixing with your hands and keep adding as much flour as it is needed to obtain a soft, wet dough that’s not too sticky. Form a ball, and let rest, covered, for 10 minutes.

  2. Heat oven to 180 C/360 F. Line a couple of baking sheets with parchment paper.

  3. Shape cookies by breaking off a small piece. Roll it into a 1-inch thick rope, about 6-7 inches long. Bring the ends together to form a ring shape. Dip cookies in sugar and place them on the prepared sheets. Bake for approximately 15-20 minutes or until golden in color.

Notes

Store these cookies in a sealed container and they’ll keep for about 10 days.

Filed Under: Desserts & Sweets Tagged With: ciambelle, cookies, dairyfree, rome, vegan, wine

  • 1
  • 2
  • 3
  • …
  • 14
  • Next Page »
  • Bloglovin
  • Facebook
  • Instagram
  • Pinterest
  • Tumblr
  • Twitter

WELCOME!

WELCOME!

I'm Lisa and this is where I like to share Italian recipes and stories about my Italian family. If you'd like to learn more about me, head over to my About page.

[F O L L O W • M E • O N • B L O G L O V I N' ]

Recipes from Friuli Venezia Giulia

Creamy Polenta with Grana Padano Cheese Fondue | Very EATalian

More Posts from this Category

Pasta & Gnocchi

Spaghetti with Tuna, Lemon and Creamy Stracciatella, Cheese | Very EATalian
Simple and flavorful Pasta e Ceci (Pasta with Chickpeas) | Very EATalian
Orecchiette with Sausage, Broccoli Rabe, and Sun-dried Tomatoes | Very EATalian
Butternut squash ravioli with sage and amaretti cookie crumbles

More Posts from this Category

Sweets & Dessert

Ciambelle al Vino: Crunchy Wine Cookies | Very EATalian
Jam-filled Pasta Frolla Cookies! Buttery, sweet and tart, they're versatile and perfect for Valentine's Day!
Crostoli: a perfectly crisp Carnevale Treat | Very EATalian

More Posts from this Category

Thanksgiving in Italy

September: time to harvest grapes to make “Il Vino del Nonno”

Trip to Sicily

Tasting Frittelle in Venice

Behind the Scenes of a Grappa Distillery

Behind the Scenes of an Artisanal Fresh Pasta Shop

STAY CONNECTED!
  • Bloglovin
  • Facebook
  • Instagram
  • Pinterest
  • Tumblr
  • Twitter
All recipes, written content, and photographs on this website have been created exclusively for Very EATalian (unless otherwise noted) and are protected by copyright. You may not use any content from this website for commercial use without express permission from the author.
Creative Commons License
This work is licensed under a Creative Commons Attribution-NonCommercial-ShareAlike 3.0 Unported License.

© 2025 Very EATalian. All rights reserved